Lens flares in a single Blender shader
First, you should prepare the following:
-
An Empty to attach the flare to. The flare parts will take a Texture Coordinate of that Object as the basis.
-
A Plane to apply this material to. Assume that its position is (0,0,0) and its rotation is (0°,0°,0°) as well.
Steps are served "image-first".
Individual parts
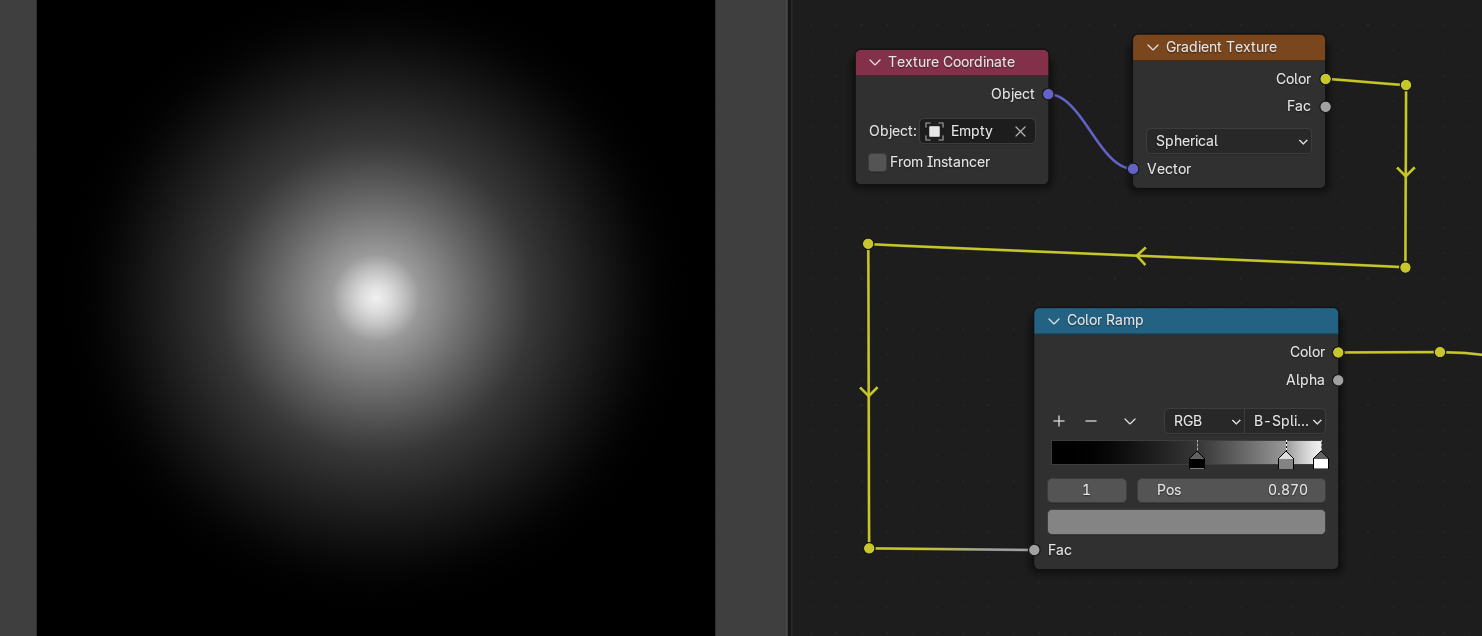
So here's the main light, of course. It's called the "fog" apparently.
Points of interest:
- Color ramp: determines the spread of the fog.
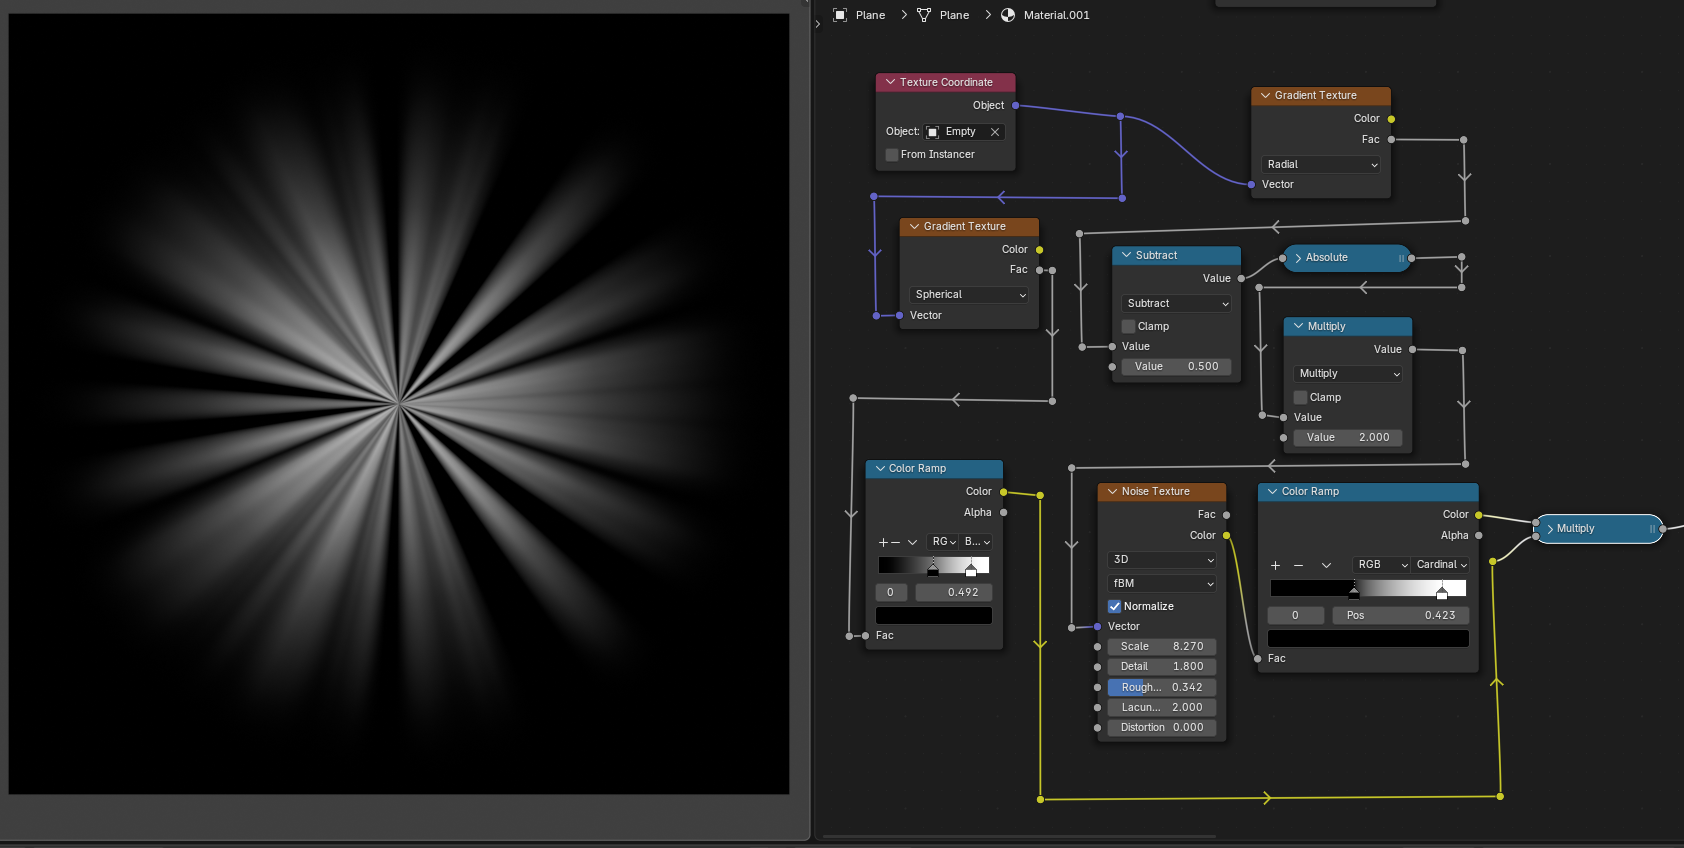
The little rays. The core of the trick is to use a radial (well, conic) gradient texture as the vector for a noise texture.
The math nodes after the radial texture is an attempt to have them "seamless", and it's mixed with a spherical texture to limit the range.
Points of interest:
- Noise texture. If you want to animate these rays, set the mode to 4D and play with the W value.
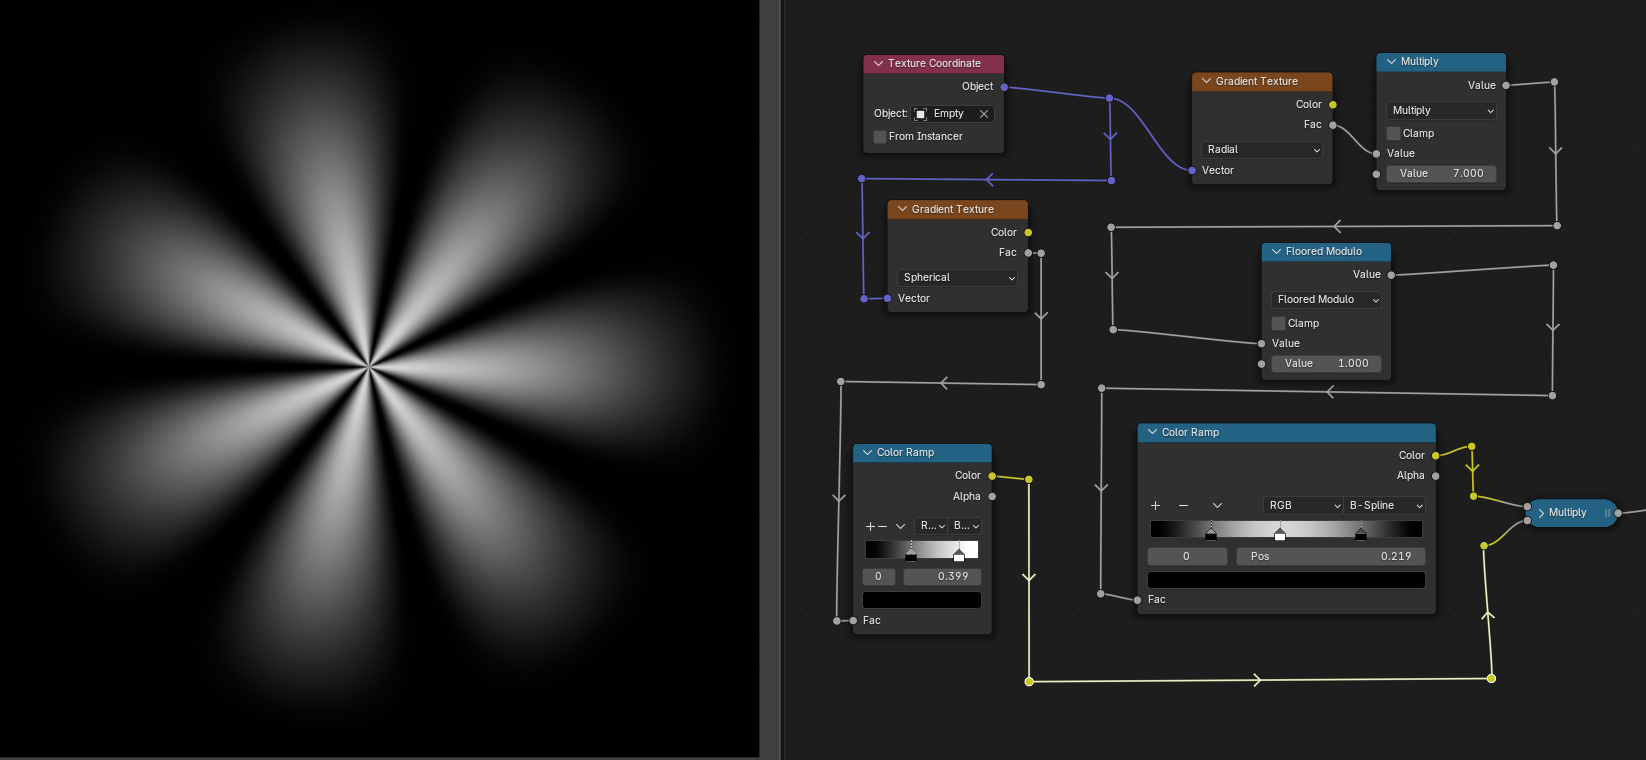
Another (simpler) way of doing the rays, if you want something that looks a little more regular.
Points of interest:
- Multiply after Radial texture. Make sure that this is a whole number.
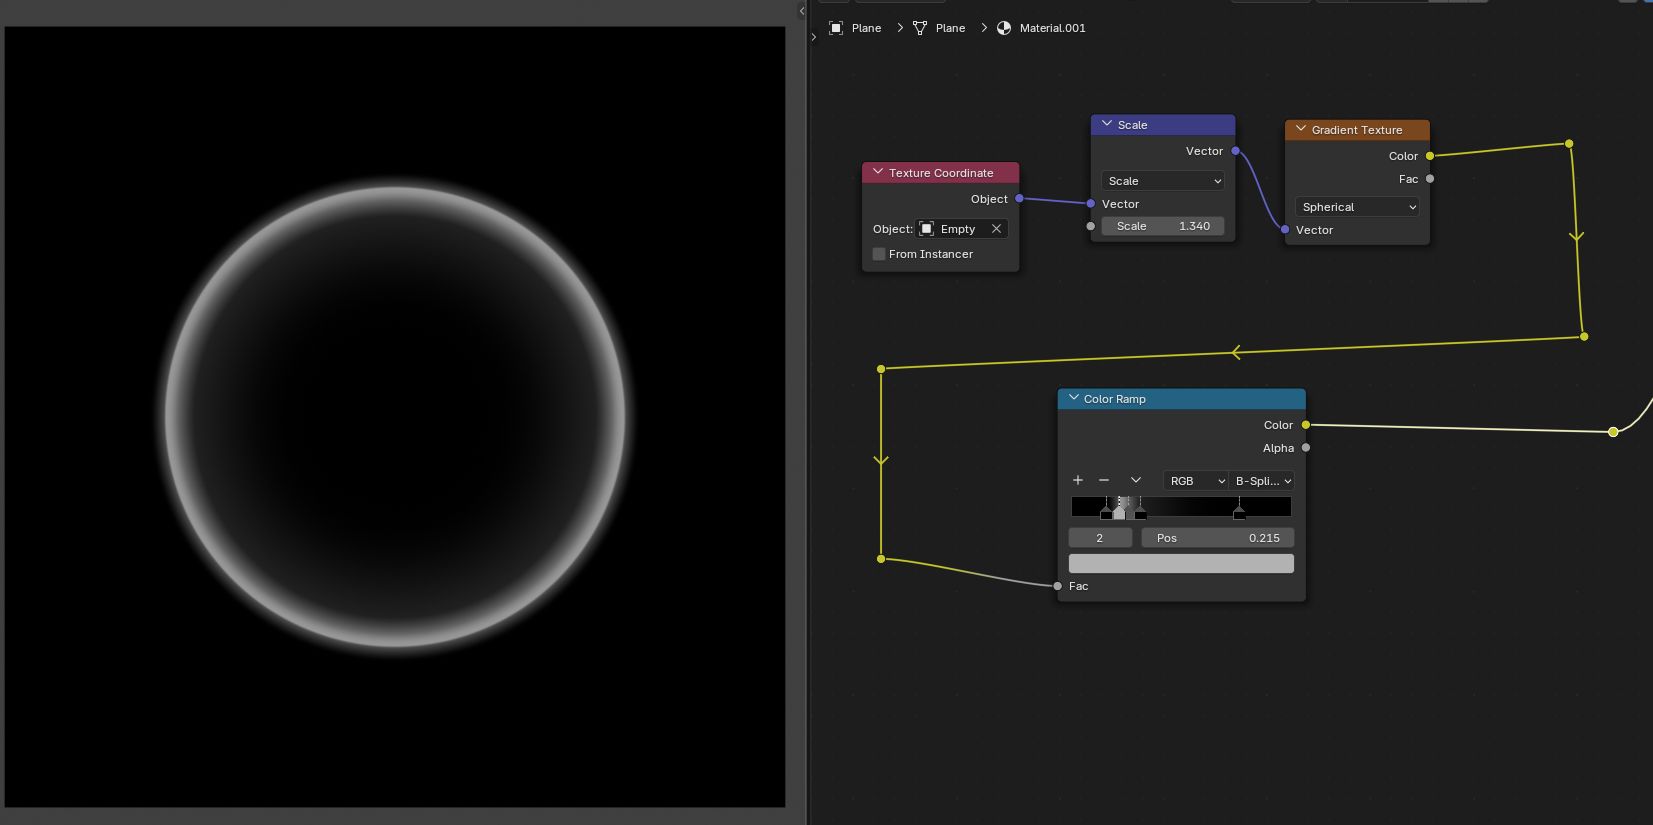
Ring. Not much to say here except "repeat as necessary".
Points of interest:
- Color ramp: play with it to also produce "hoops".
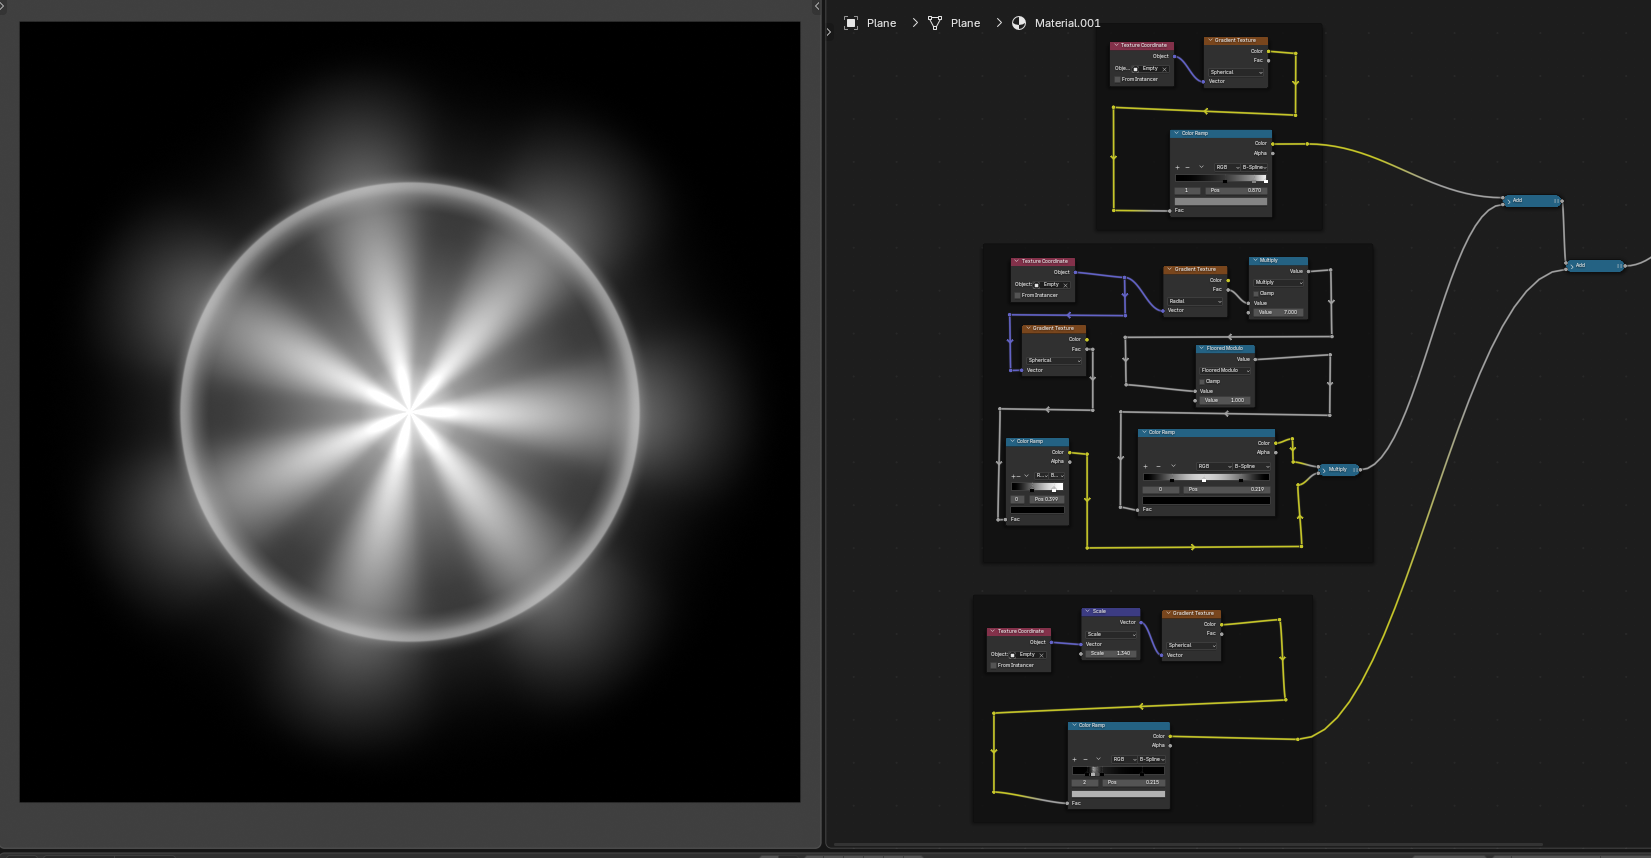
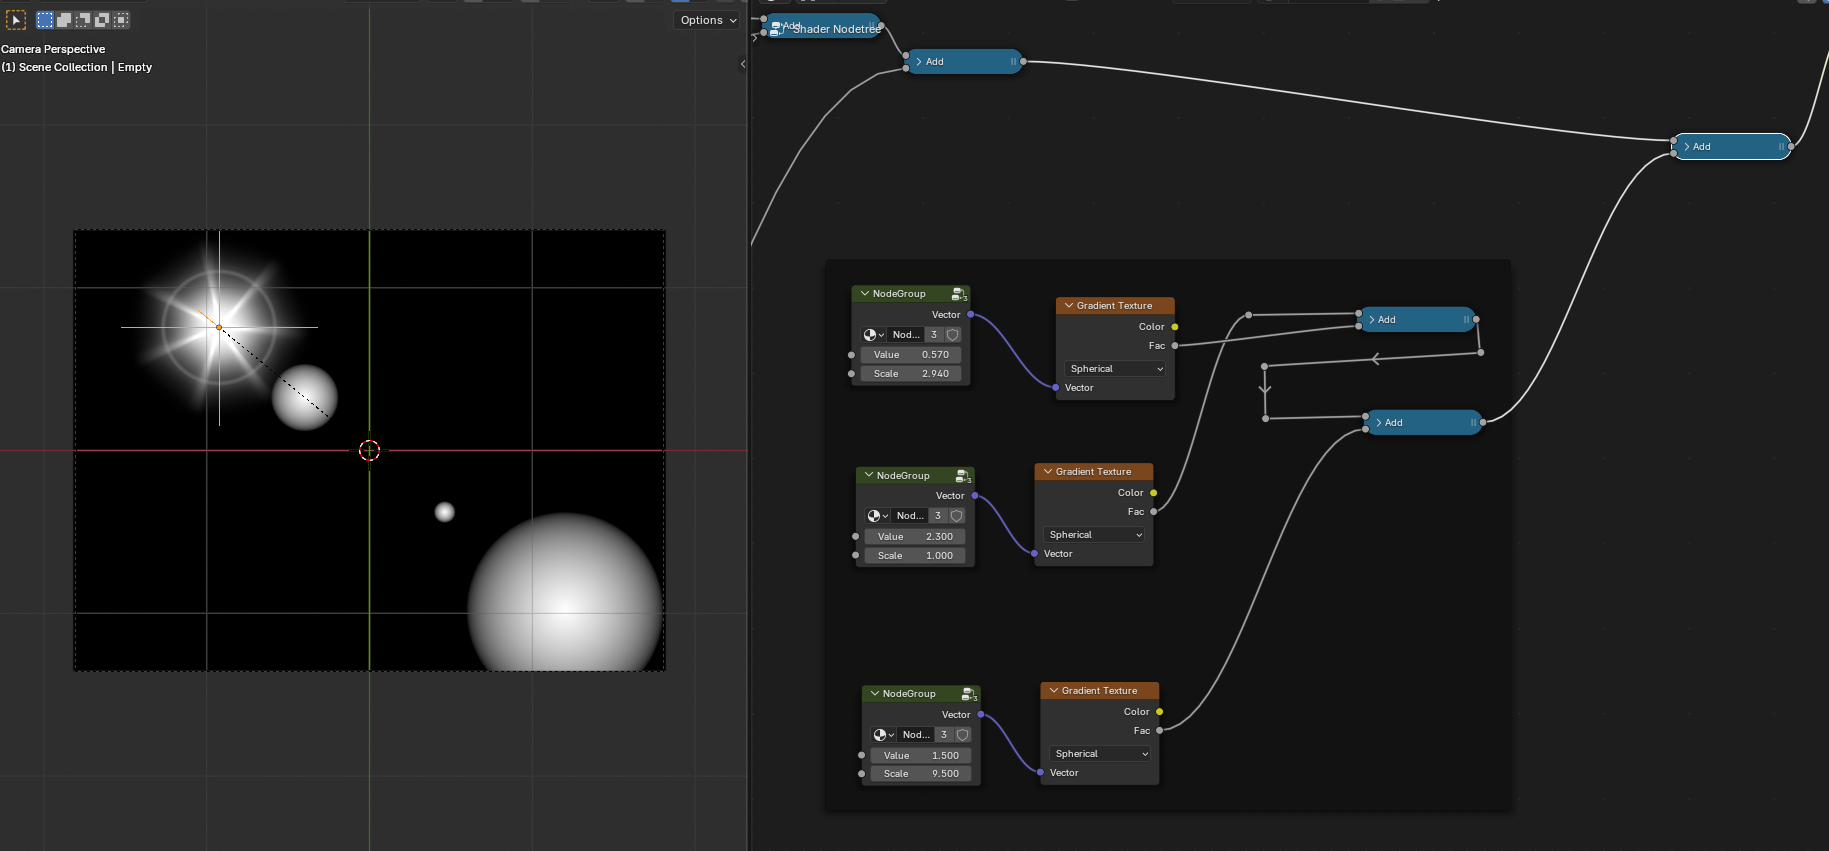
Let's add these parts together. Okay, looks like shit but not to worry, it's just the color ramps that need improving.
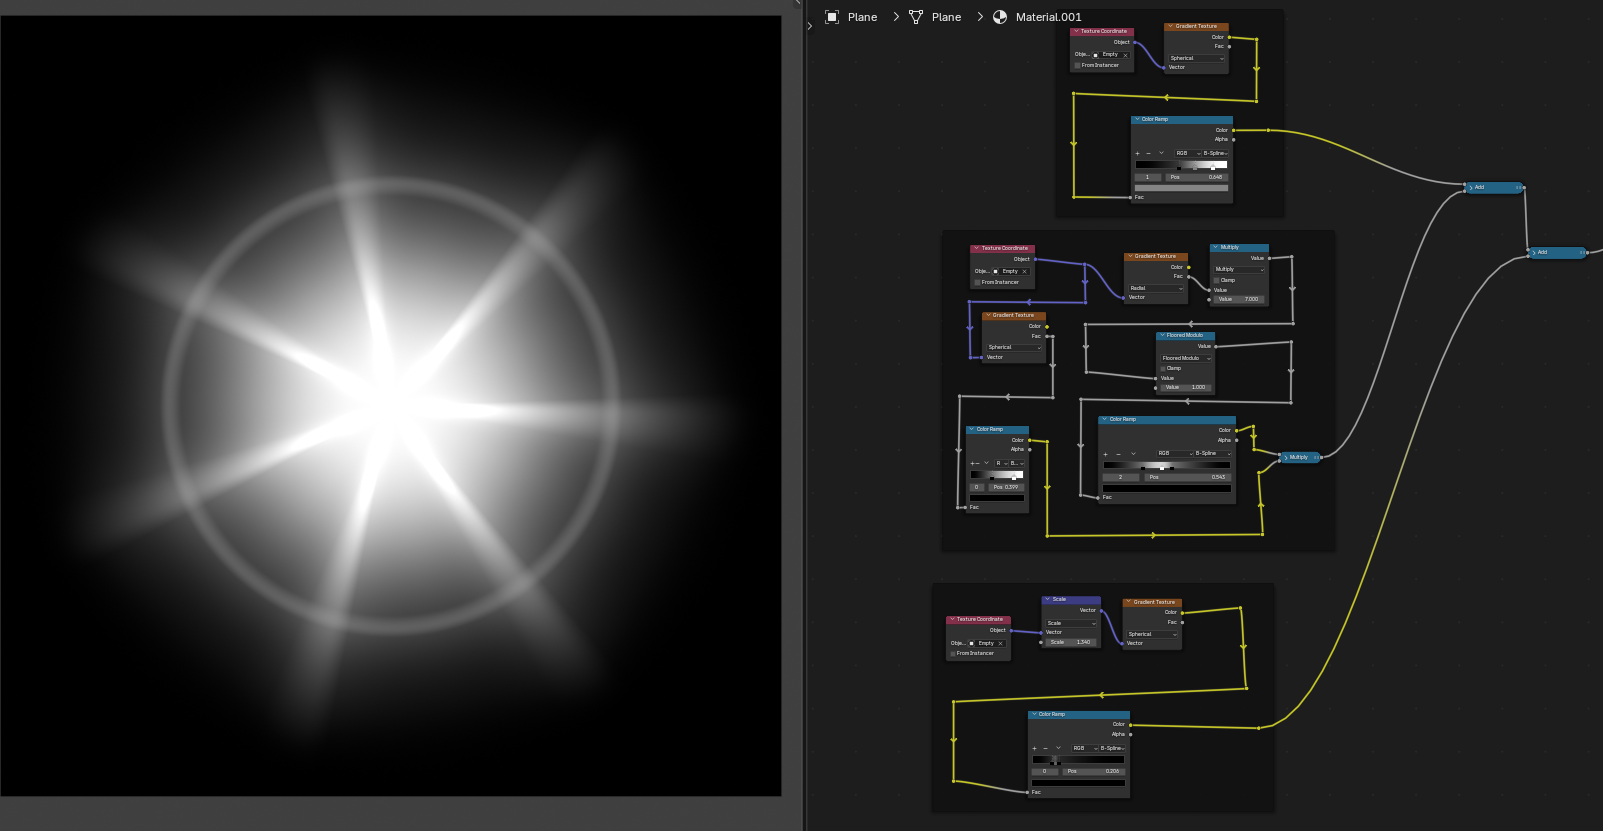
Yeah, much better.
Positioning the ghosts
At this point, you can play around with the Empty, and all the elements so far will follow. But ghosting is where the magic happens, because they run opposite of the main light.
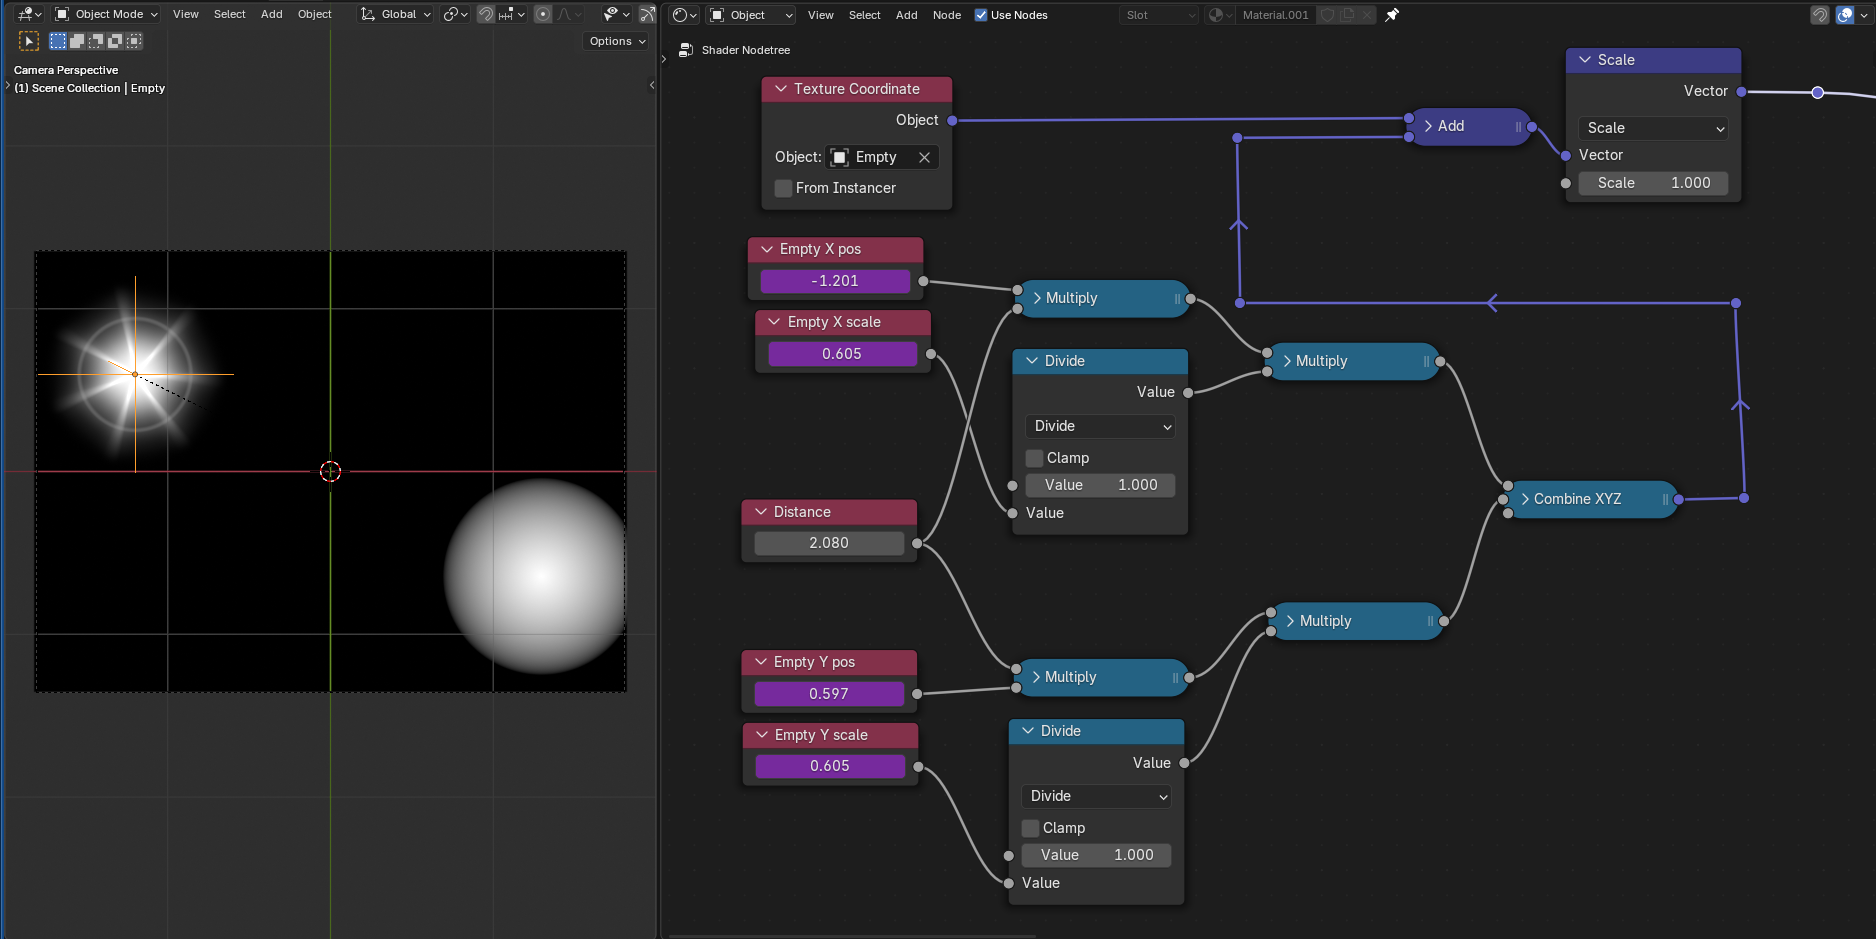
What this monstrosity does is offset the Empty's position somehow so that it becomes an "inverse" of itself relative to (0, 0). This also means that this setup ONLY works if the Empty (or the Plane) is at (0, 0) and is facing (0°, 0°).
The Scale node at the end operates as usual: determining the "size" of said element.
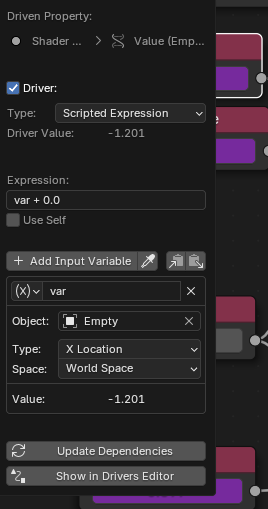
The Empty X pos, X scale etc. are Value nodes with its respective driver
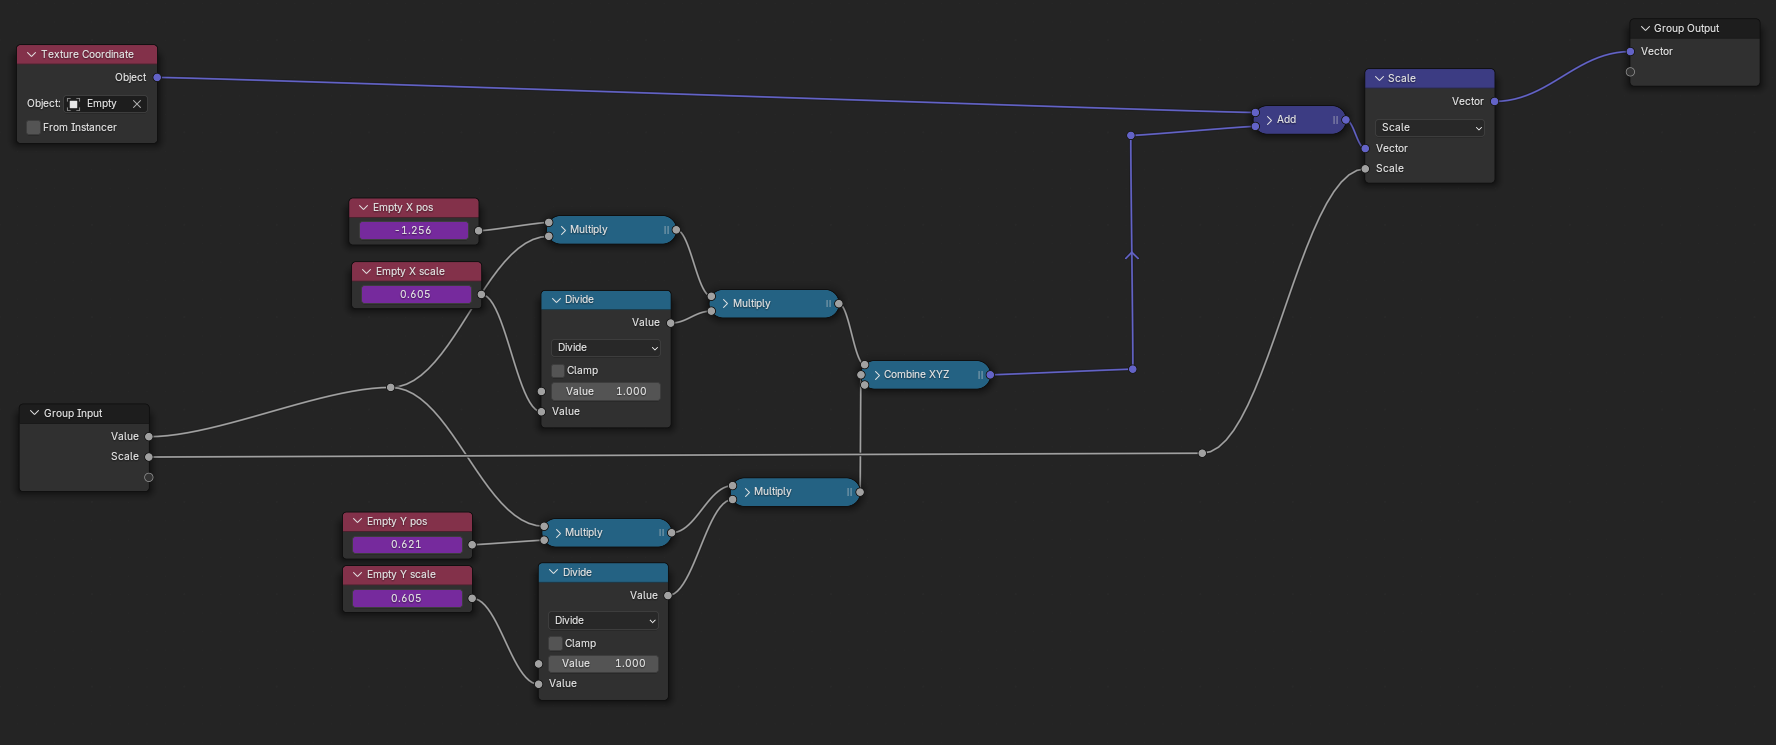
Certainly you can make this a node group...
...and then use it to drive tons of ghosts!