Trails!
Here's something I've recently used, specifically in my VCL logo remake. The trail effect that seems to be popular in stuff from the 60s through the 80s. Thanks to Studio S for the tip!
The idea here is:
-
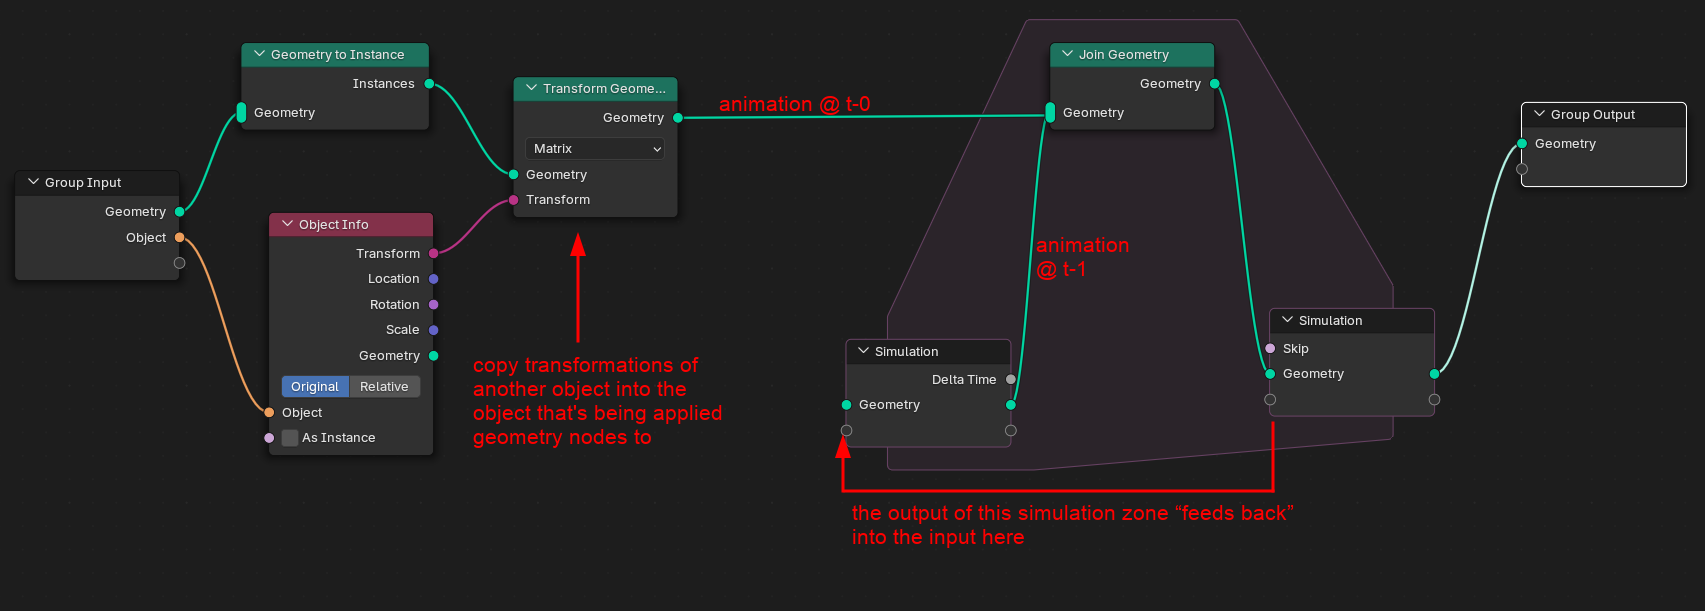
Left side: Move, etc. the object that's being operated on (i.e. the one with the Geometry Nodes modifier) with another object, say, an empty
-
Right side: Add a trail effect using a feedback loop provided by the Simulation zone.
If the transformation is applied to the object with the geo nodes modifier, then it won't work, because the simulation zone won't be able to capture that.
In the WPIX remake I previously used a repeat zone. From what I can gather, here are the differences:
| Zone | Iterates through… | Time affected? | For |
|---|---|---|---|
| Repeat | a fixed amount of iterations | no | instancing or performing operations on geometry a bunch of times |
| For-each | individual elements in something | no | doing operations with instances within a geometry, points within a geometry, etc. |
| Simulation | across frames | YES | performing geometry operations affected by frame changes |
It does make sense then why we can use a simulation zone for this type of effect, the point is leaving a trail of whatever previous state the geometry was in alongside the new one. Side note, this seems to also work if the object has shape keys:
However, this node setup presents some problems. If you play the animation back, the simulation zone will keep going and adding objects. If the original object is quite complex, like, say, the map of the world, it adds up quickly.

To fix this problem, we can delete the trails that we don't want to render anymore.
-
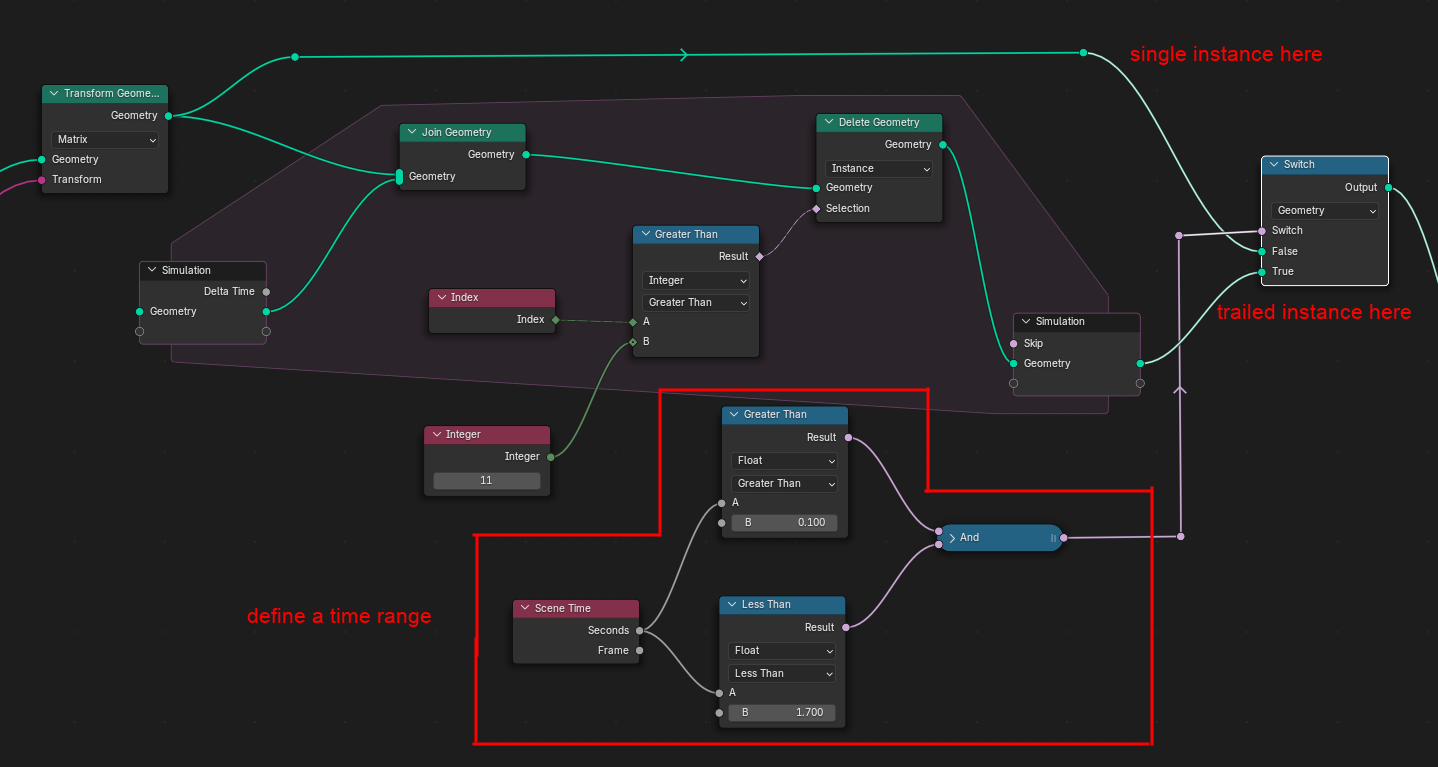
So we want to delete a portion of the generated geometry. But what kinds of geometry do we want to delete?
-
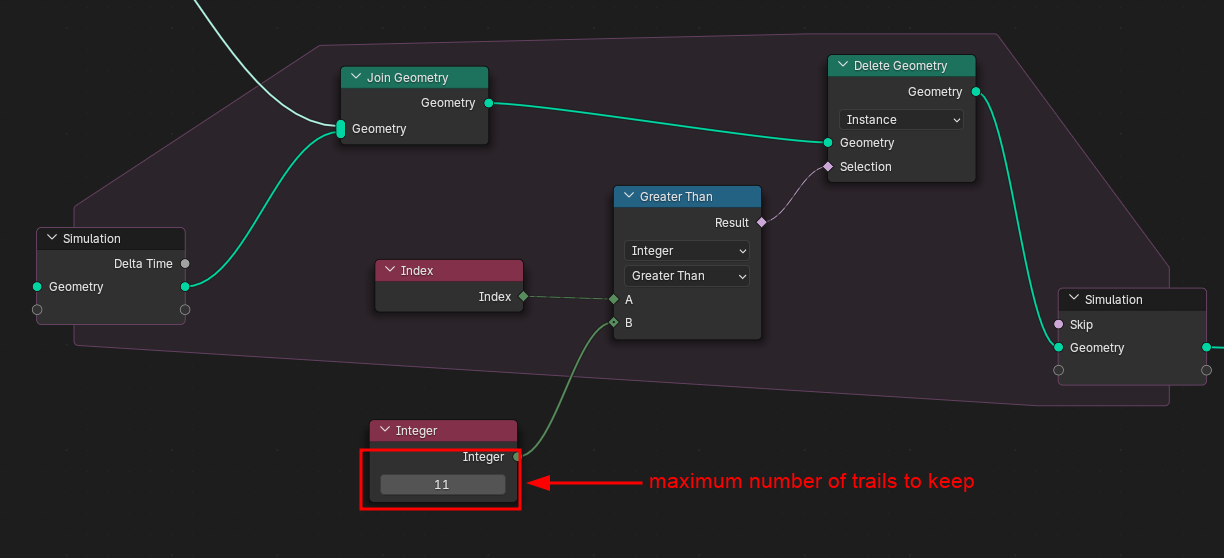
Every instance has its own index. We can select instances of a certain index using the Compare node.
-
We specify that we want to delete instances with indices greater than X, where X is the maximum trails we want to keep per frame.
-
This, in effect, says "delete trails older than X frames". In the above screenshot, "get rid of trails that are 11 frames old"
But what if we want the trail to be between time A and B? Well we break the conditional down, and then use it as an input for the Switch node:
Okay, one last thing. If you want your trails to fade away smoothly. It's a little hard to see so you might want to open the image in a new tab or something.
-
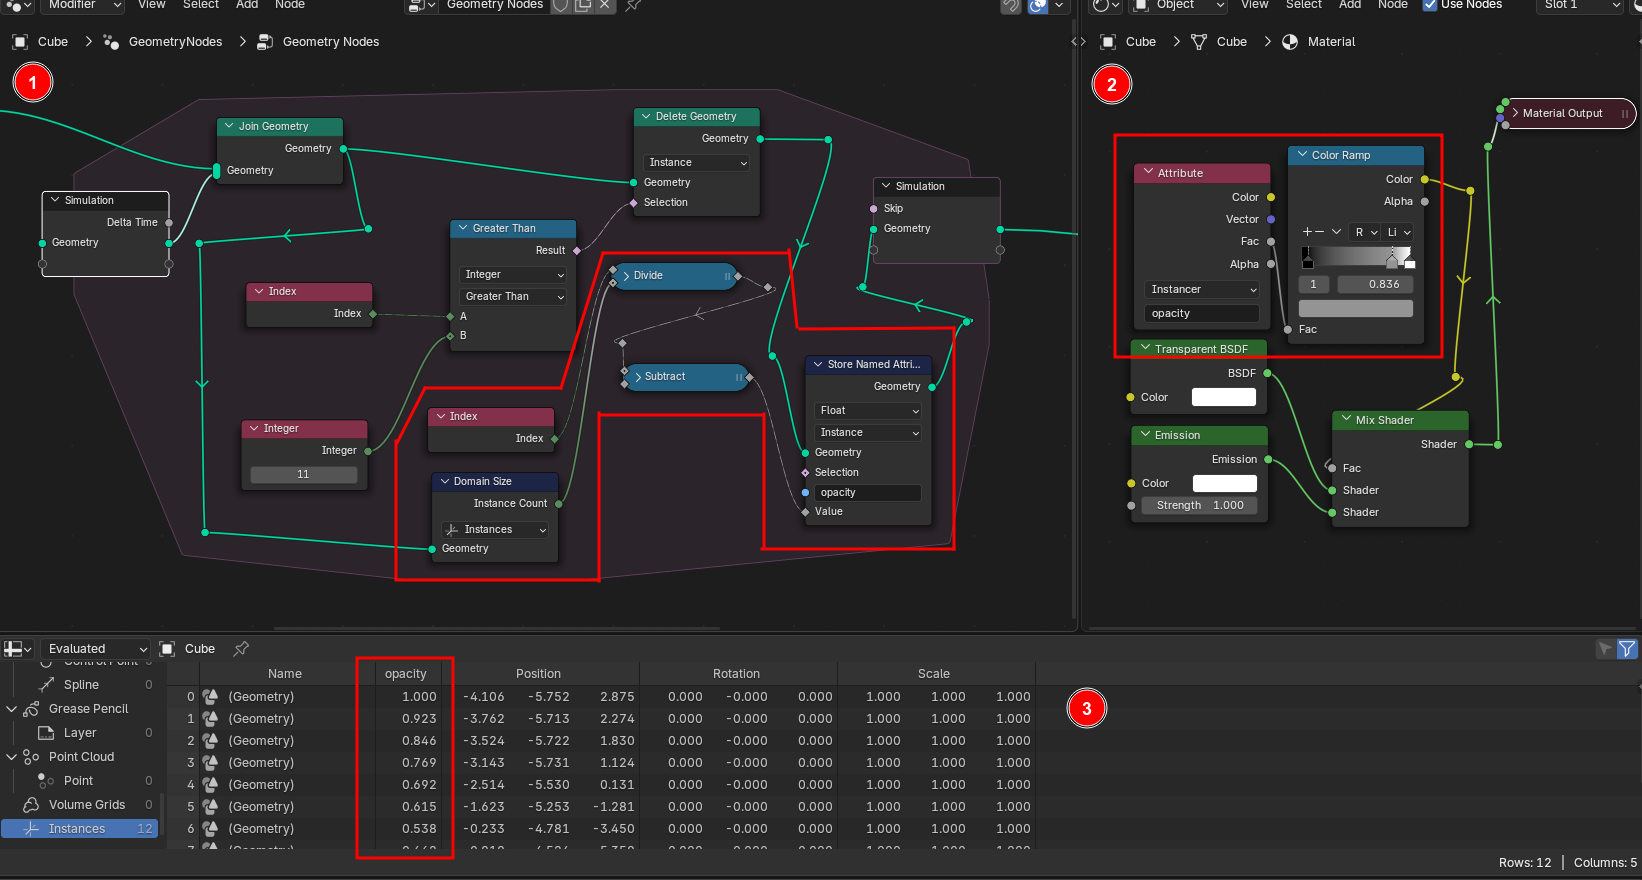
We're adding a new attribute to the instances named "opacity" that will contain some number between 0 and 1, and it depends on the age of each trail. The newest one will have a value of 1.0, and the oldest close to 0.0.
We build this attribute by getting the number of instances through a node called "Domain Size" (god I hate that name), dividing the instance's index by it and then subtracting it from 1.0.
-
The material that's assigned to the whole object can read this attribute, so we can use it as the mix factor of the material between transparent and a full emission. We can use a color ramp to control the fade here.
-
Here's how the attribute looks in the spreadsheet. Notice the value dropping with each index, because the higher indices indicate older trails.
