Geometry Nodes cookbook?
Yeah, this isn't really a "cookbook" but more of, again, notes on doing certain effects.
Autofitting text
Thanks to pjfrix for the tip!
There are two parts to this node setup.
1. Fine tuning spacing
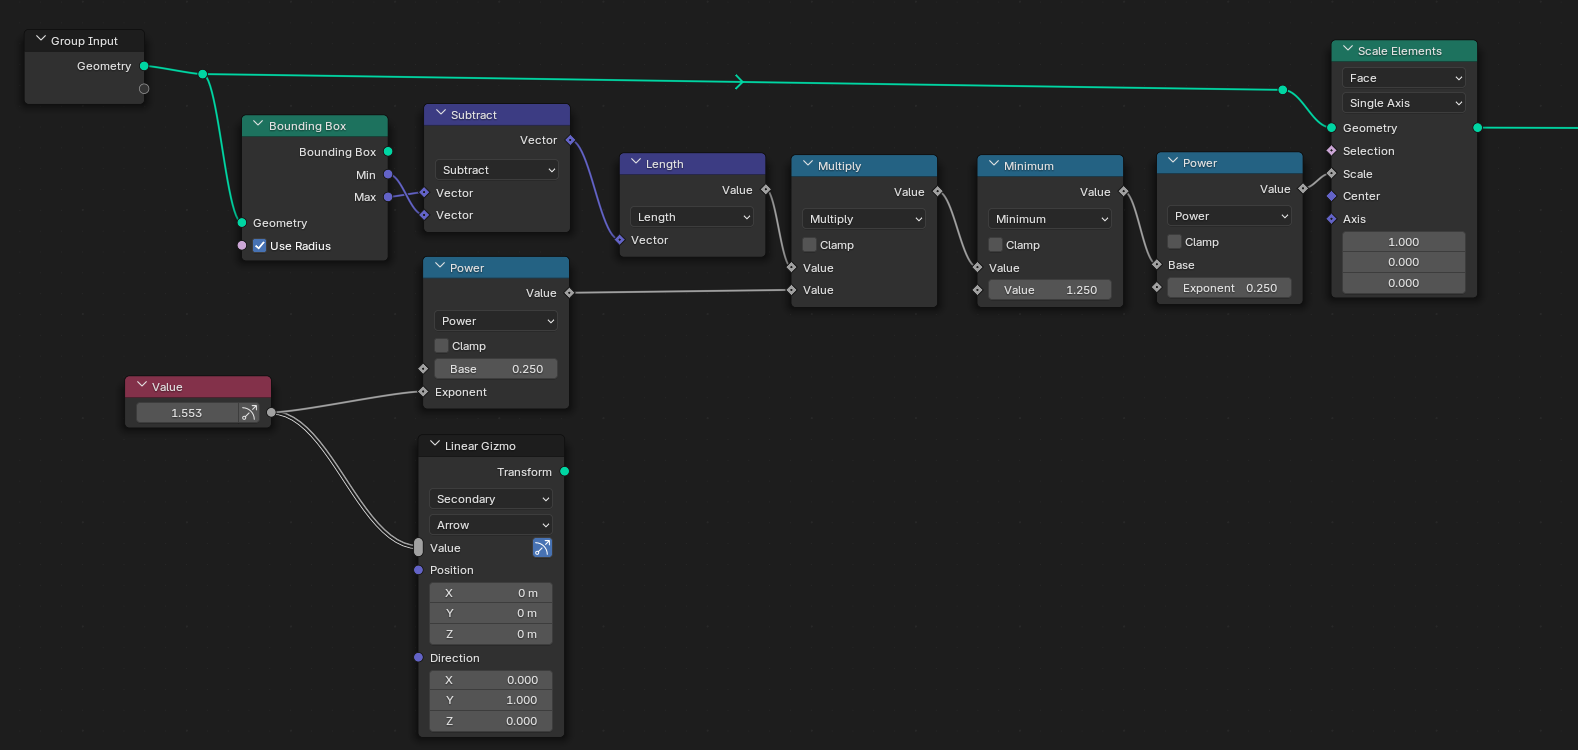
This first part scales down the individual characters, changing their effective spacing.
The gizmo being set up here points in the local Y axis.
2. Autoscale text to a fixed boundary
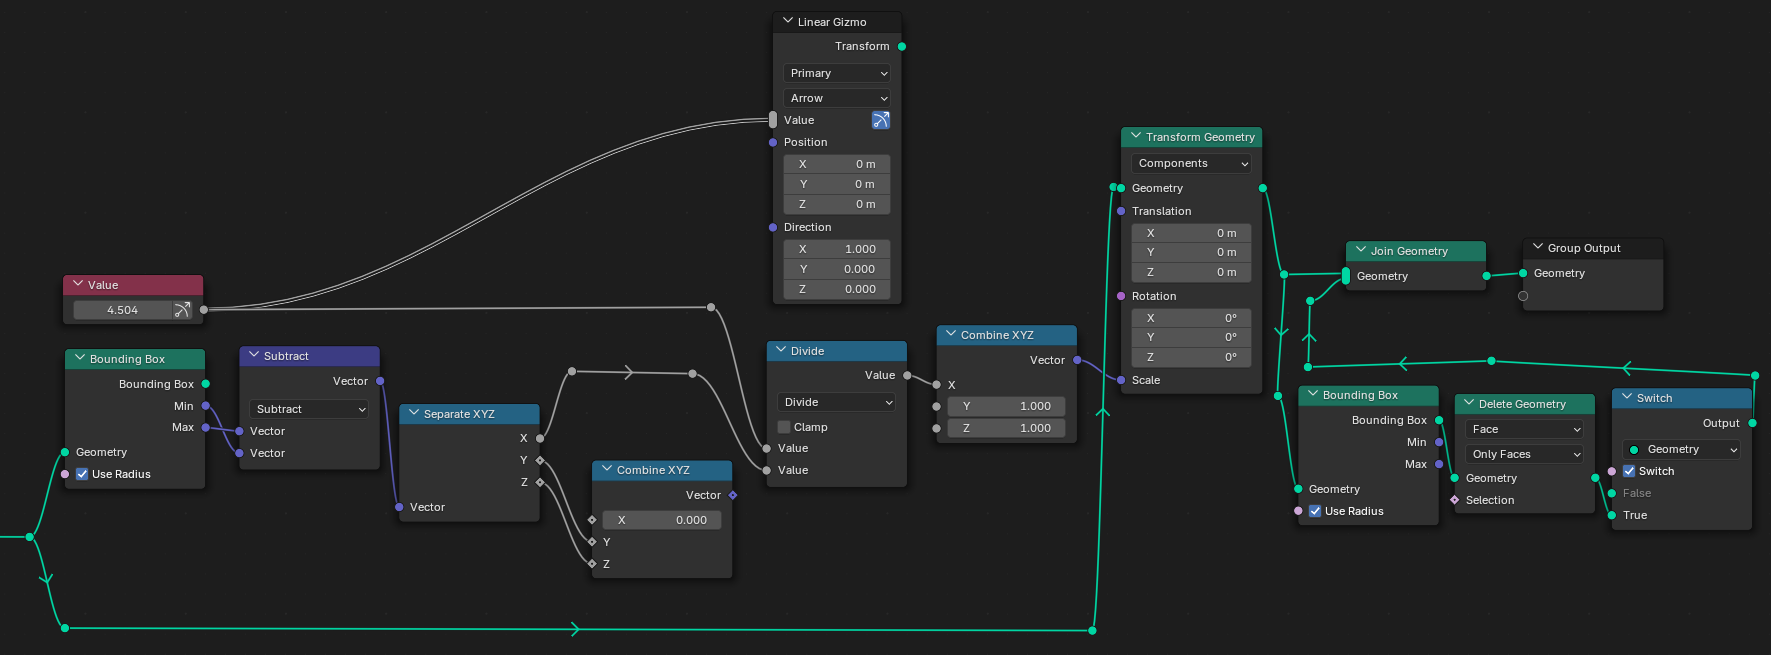
This second part actually performs the scaling. It essentially takes the text's bounding box, replaces the X range with one of our choosing (which can be controlled with a gizmo), and then stretches/squishes the text geometry so that it fits with our custom bounding box.
What the resulting geometry is joined with is its own bounding box, so we can see it in the viewport. The Switch node lets us enable or disable it.
The gizmo being set up here points in the local X axis.
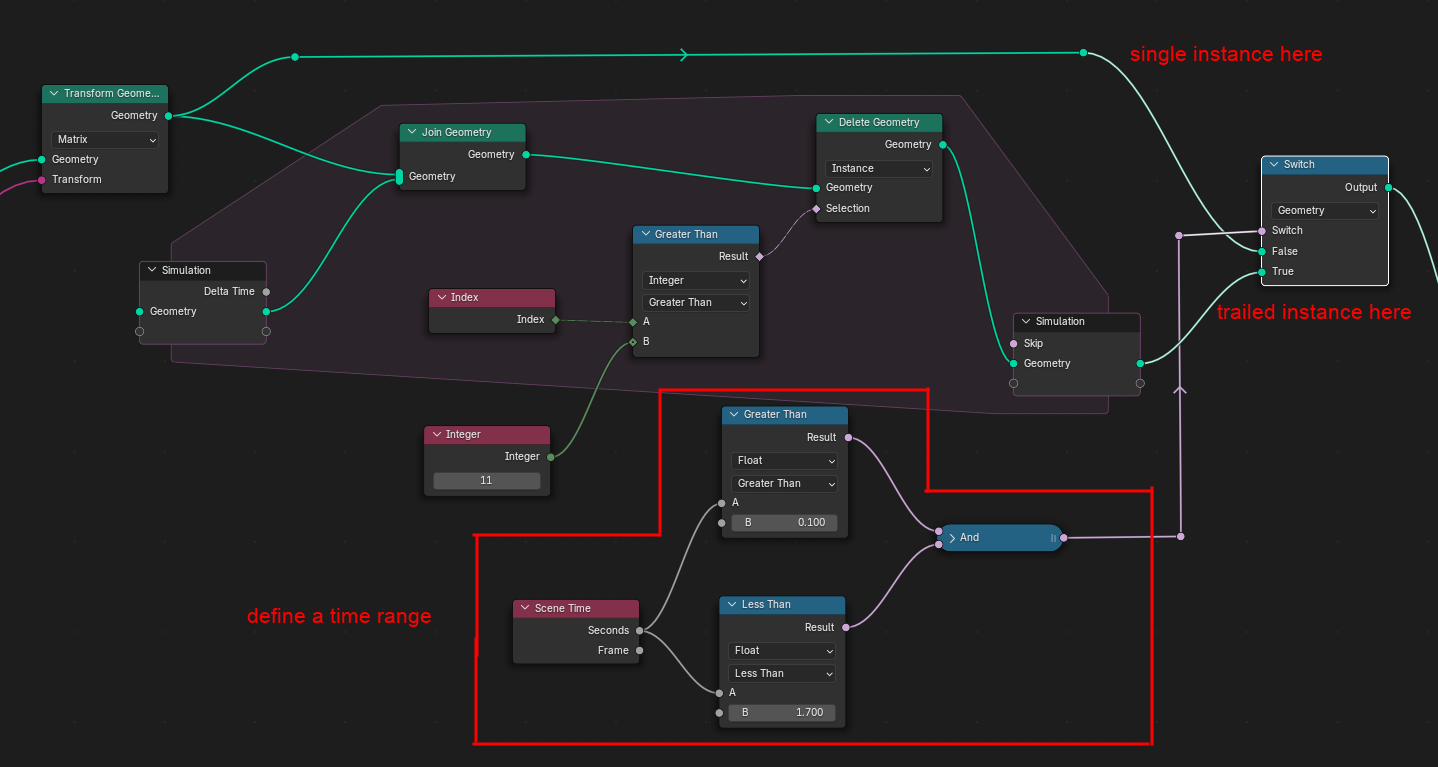
Trails!
Here's something I've recently used, specifically in my VCL logo remake. The trail effect that seems to be popular in stuff from the 60s through the 80s. Thanks to Studio S for the tip!
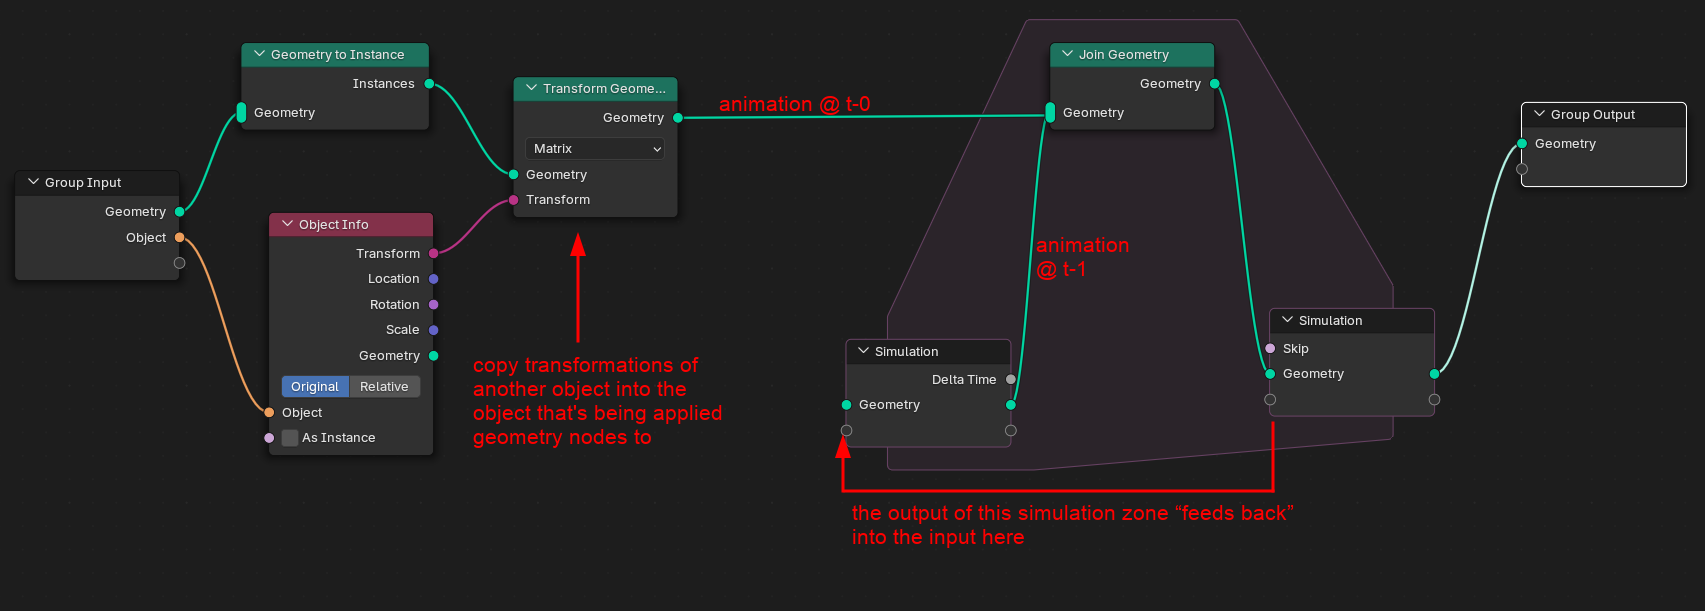
The idea here is:
Left side: Move, etc. the object that's being operated on (i.e. the one with the Geometry Nodes modifier) with another object, say, an empty
Right side: Add a trail effect using a feedback loop provided by the Simulation zone.
In the WPIX remake I previously used a repeat zone. From what I can gather, here are the differences:
| Zone | Iterates through… | Time affected? | For |
|---|---|---|---|
| Repeat | a fixed amount of iterations | no | instancing or performing operations on geometry a bunch of times |
| For-each | individual elements in something | no | doing operations with instances within a geometry, points within a geometry, etc. |
| Simulation | across frames | YES | performing geometry operations affected by frame changes |
It does make sense then why we can use a simulation zone for this type of effect, the point is leaving a trail of whatever previous state the geometry was in alongside the new one. Side note, this seems to also work if the object has shape keys:
However, this node setup presents some problems. If you play the animation back, the simulation zone will keep going and adding objects. If the original object is quite complex, like, say, the map of the world, it adds up quickly.

To fix this problem, we can delete the trails that we don't want to render anymore.
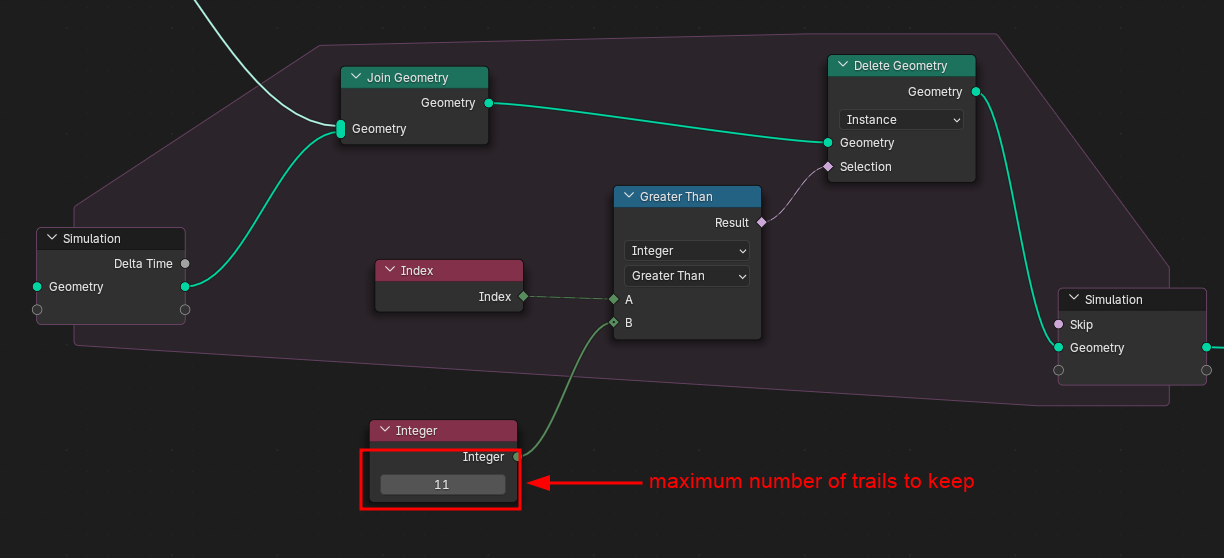
So we want to delete a portion of the generated geometry. But what kinds of geometry do we want to delete?
Every instance has its own index. We can select instances of a certain index using the Compare node.
We specify that we want to delete instances with indices greater than X, where X is the maximum trails we want to keep per frame.
This, in effect, says "delete trails older than X frames". In the above screenshot, "get rid of trails that are 11 frames old"
But what if we want the trail to be between time A and B? Well we break the conditional down, and then use it as an input for the Switch node:
Okay, one last thing. If you want your trails to fade away smoothly. It's a little hard to see so you might want to open the image in a new tab or something.
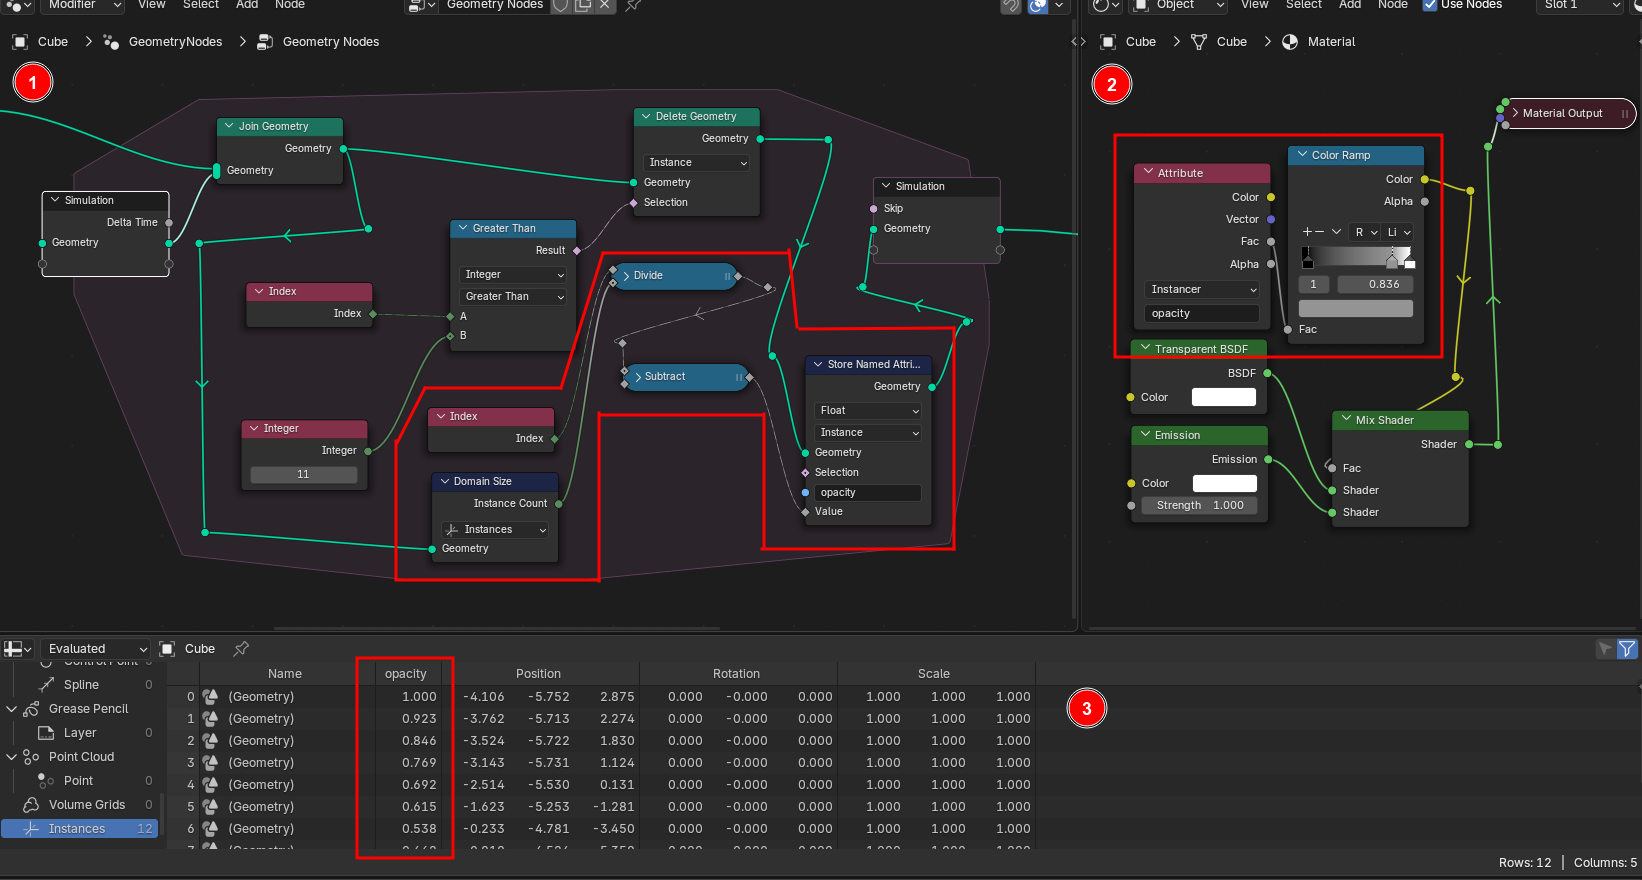
We're adding a new attribute to the instances named "opacity" that will contain some number between 0 and 1, and it depends on the age of each trail. The newest one will have a value of 1.0, and the oldest close to 0.0.
We build this attribute by getting the number of instances through a node called "Domain Size" (god I hate that name), dividing the instance's index by it and then subtracting it from 1.0.
The material that's assigned to the whole object can read this attribute, so we can use it as the mix factor of the material between transparent and a full emission. We can use a color ramp to control the fade here.
Here's how the attribute looks in the spreadsheet. Notice the value dropping with each index, because the higher indices indicate older trails.

Expanding curves
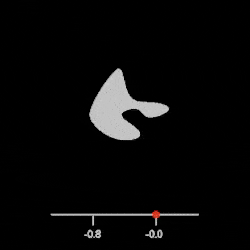
Here's a motion graphic effect I had an idea on for probably a few days—have a logo expand until it fills up the screen. Demonstrated here with a random curve with the expand parameter animated. It, however, does not work with contracting.
The idea here is to take each point in the curve and "expand" it away from the point's normal, which is just saying what direction is perpendicular at the location of the point.

To accomplish this, the curve is resampled so that some attributes can be taken at any known point. The sample range is from 0.0–1.0, so take the vertex index and divide it by the "length" (or how many vertices there are), so with each index we have the value of its normal.
Then we take that normal vector and scale it, this scale is the expand parameter.
Finally we can apply this to every vertex in the curve to apply that effect.
Resources for making fonts!
Designing letters
Here's a graph that shows what letters you can "cannibalize" when you want to design some other letter. For example, for Y, you want to take elements from I and also V, which is why those two other nodes point to Y. Or what letters you can make from another letter. For example, v can be used to make y and w, which is why those two "come from" the v node.
The graph is interactive! You can hover over a letter or a number in the graph below to highlight what characters can be made from it, or how it can be created from other characters. The O H n o nodes has been highlighted in cyan as those letters are commonly how you start making a font.
Please note, that this is just ONE possible graph of deriving lots of characters from other characters. There are many ways to do this, of course depending on your specific designs and what you want to go for.
Rendered with the command
dot -Tsvg fonthier.dot -Glabel="" -Elabel="" > fonthier.dot.svg
Spacing and kerning
-
Robofont — Intro to Spacing
A pretty good guide to spacing letters, regardless of font software. I reproduced the spacing relationship table here:
left right lower/straight n h m u l i j k b p r n h m u l i j lower/round o c e d q o b p lower/angled v w y x v w y x k upper/straight H E F L I B D P R M N K H I J upper/round O C G Q O D Q upper/angled V W Y A X V W Y A X K
-
Making Biorhyme — Spacing
Though a bit broken, it's an interesting write-up. Includes Walter Tracy's method of determining letter spacing:
-
Kern King
By Leslie Cabarga. It's a weird text file. But it is specifically designed to troubleshoot kerning issues that might pop up in real world use.
-
Minimum Kerning Pairs
By Impallari Type.
-
Font Testing Page
Where those two text files above came from.
-
Stephen Nixon's Spacing resource page
Heaps more complete than this one, really.
And of course there's also Puz's type design crash course, which plunged me further down this artsy rabbit hole.
MGM/UA Home Video - 1993 logo remake

It's that time of year again. A highly-anticipated remake gets released and suddenly everyone wants a piece of that pie.
Well, I do too... and also two-others. Maybe more on the way. I don't know.
Rollercoaster scene
The “critical point” was animating the camera on the first scene as it goes down the filmstrip rollercoaster. It did take a while for TVS and co to figure that out. So that's what I did first, to just get the hard part out of the way.
This first attempt of mine is... not very optimal. What I usually do when I find moving the camera to be too hard is to flip the tables and have everything else move around the camera. In this case, it works, up to a certain point.
Midway through I ended up having to move the camera anyway because that empty is getting wayy too hard to control thanks to its anchor point being all the way at the edge. So the first part doesn't look too bad, but then its… yeah.
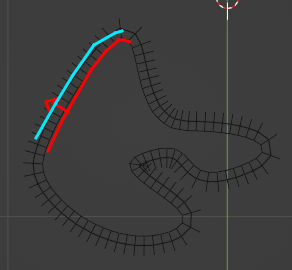
Aside from the camera, the curve itself is also a bit tricky to get right, especially around the U-turn where the handles are especially a pain:
The bends on it are very tight for whatever reason
— ordinaryboss

For the filmstrip itself, I opted to use an actual model and just slap some modifiers on it, because it seems easier to edit. This same basic filmstrip model is used for both scenes, although they aren't identical.


There's an Add Camera Rig extension that adds a couple of more options to the add camera menu.
The “dolly rig” is one of them, and it's packed with drivers and stuff. Point being, it's easier to control than whatever hack that mess was.
Well, it looks better now, but it's using linear interpolation. The pain only starts when I change them all to bezier and start smoothing it out, because oh boy. There's a lot of things that become misaligned and wonky in unpredictable ways, and that's where the real battle lies.
I did learn not to parent the aim to the camera itself though, or else this happens:
I still believe that it's actually more trouble than it's worth to try and replicate everything shot-by-shot if the frames in-between end up going absolutely everywhere. It's like trying to fit a curve where technically the important points match, but it doesn't at all look like the real thing.
So my focus when I do this kind of stuff is instead how smooth the camera is, not necessarily the percentage of similarity when you overlay the original thing with the remake. Oftentimes, getting the feel that it's as smooth as the original is enough.
Anyway, here's what I ended up with after a bit of fiddling. Not too bad. Although at this stage the camera movement is still rough especially when it lunges forward into the filmstrip, something that I would eventually fix.
Like others' attempts, the light rays were an actual 3D model built into the filmstrip.
The MGM logo reveal
Filmstrip
Modelling the filmstrip itself is kind of interesting. I used the same method as above to fit a complex filmstrip base into a curve.
It gets trickier still—I couldn't get the curves to orient properly. That is, until I was made aware of this:

Some others prefer to use a single texture to provide the filmstrip look with the model itself being a simple subsurfed plane. Understandable, as even in my setup, with the points it has to render and the fact there's a video texture on it, everything gets kind of laggy. Look at that sub-20 FPS on that preview.
Camera movement
There's two parts that move here: the camera and the model itself.
The model itself is moved first to—again—kind of match the source material with easier control. You might notice that empty in the video (even if it's kind of hard to see). Everything is parented to it so that the whole model moves together.
Then the camera is used to help make it pop up from the bottom of the screen. In the original, the model sort of "pops", as if being viewed from a wide angle. I lowered the focal length to replicate this.
Shine

Next up, the shine on this particular ribbon. I noticed that on the original it may have been "physical", like the filmstrip on the first scene. Unfortunately, simply modifying the model doesn't give me the expected results, since the curve also changes the individual orientation of the ribbon at each point, causing the rays to follow suit.
What I ended up doing is:
- Duplicate the model
- Delete everything except the vertices that make up the sprocket holes
- Extrude them upwards, creating the shine
- Skew them a bit using shape keys as needed
I could have again used geometry nodes for this, but I just didn't feel like it.
So that's for the ribbon. As for the mask and reef, they too have a similar shine, except there is a bit of a pattern that I tried to replicate: my interpretation was that the edges alternate between light and dark.
The first thing I tried was somehow assigning materials from within the Edit Mode. That didn't work, as materials are assigned to faces. It's at this time that now I remembered that geometry nodes existed, and so I can just use the edges individual indices to assign the materials: odd ones get the brighter material, even ones get the darker one. Maybe I got that backwards. I'll have to check (and post the image on here too)
As the mask and reef looked tiny in the way I angled the camera, to get it to look like the source material I cheated a bit here by animating its overall scale—of course, parenting both the mask and reef to another empty to make it easier.
Mask and reef
Speaking of, I'll briefly go over how these are modeled. I did reference the prototype versions of the logo as the details in these parts are clearer, and there is footage in them of these parts by themselves.
-
The reef is a bunch of curves with a mirror modifier applied.
I can Shrink/Fatten the vertices to control their individual size, although I find it a bit hard to control how exactly one vertex transitions to the other. Seems to be a straight line. The best I could do is control the handle size of the vertices, which seems to approximate the kind of tapering that is used.
-
The mask is two parts: a regular mesh with mirror and subsurf applied to it; and some closed curves with only a bevel on them.
Some other models I've seen apply so much detail to it that, even in HD, is not really that noticeable. Yet some others also try to make the mask a single mesh so as not to deal with so many objects.
For the final (golden) mask object I duplicated the mask created here and adjusted the mesh a bit to cover the area under the eyes.
Leo footage
I already had some Leo footage on hand, which is perfectly fine since it blends in Leo with his body extended from the MGM Television logo. But it still feels a bit too blurry for some reason. So I tried to make another one from a good enough rip of the 2008 logo. It does introduce some holes at the bottom but I figured it's still worth a try.
Final logo formup
Short points here, I might detail some more later.
The particles aren't too hard, the object used is a bright white circle and placed in its own layer, so the sparkles are added in using compositing. As to how it forms up, I just used the build modifier. It's a bit tricky however trying to adjust the build order. And because I'm lazy, I'm also using the mirror modifier because the whole thing is symmetric anyway. Although it is a little less precise.
Since the filmstrips on the MGM and the MGM/UA parts look a bit different, I extended the flash to cover the entire thing instead of just the center part and mask. I should note that in the source material the filmstrips on both parts are almost identical, one of the things missing in the MGM/UA one is the white shiny parts near the mask and reef. But mine differs a bit more than that, including some of the curvature.
There's two ways to paint the filmstrips. One is to paint the textures, the other is painting "with light". I chose the latter. :p
Geometry nodes are used for the "MGM/UA" text spinning in, it should make editing this specific part easier.
The final shine particles are applied on a huge plane covering the whole screen, and the masking was done in compositing. That way you don't need to adjust anything else.
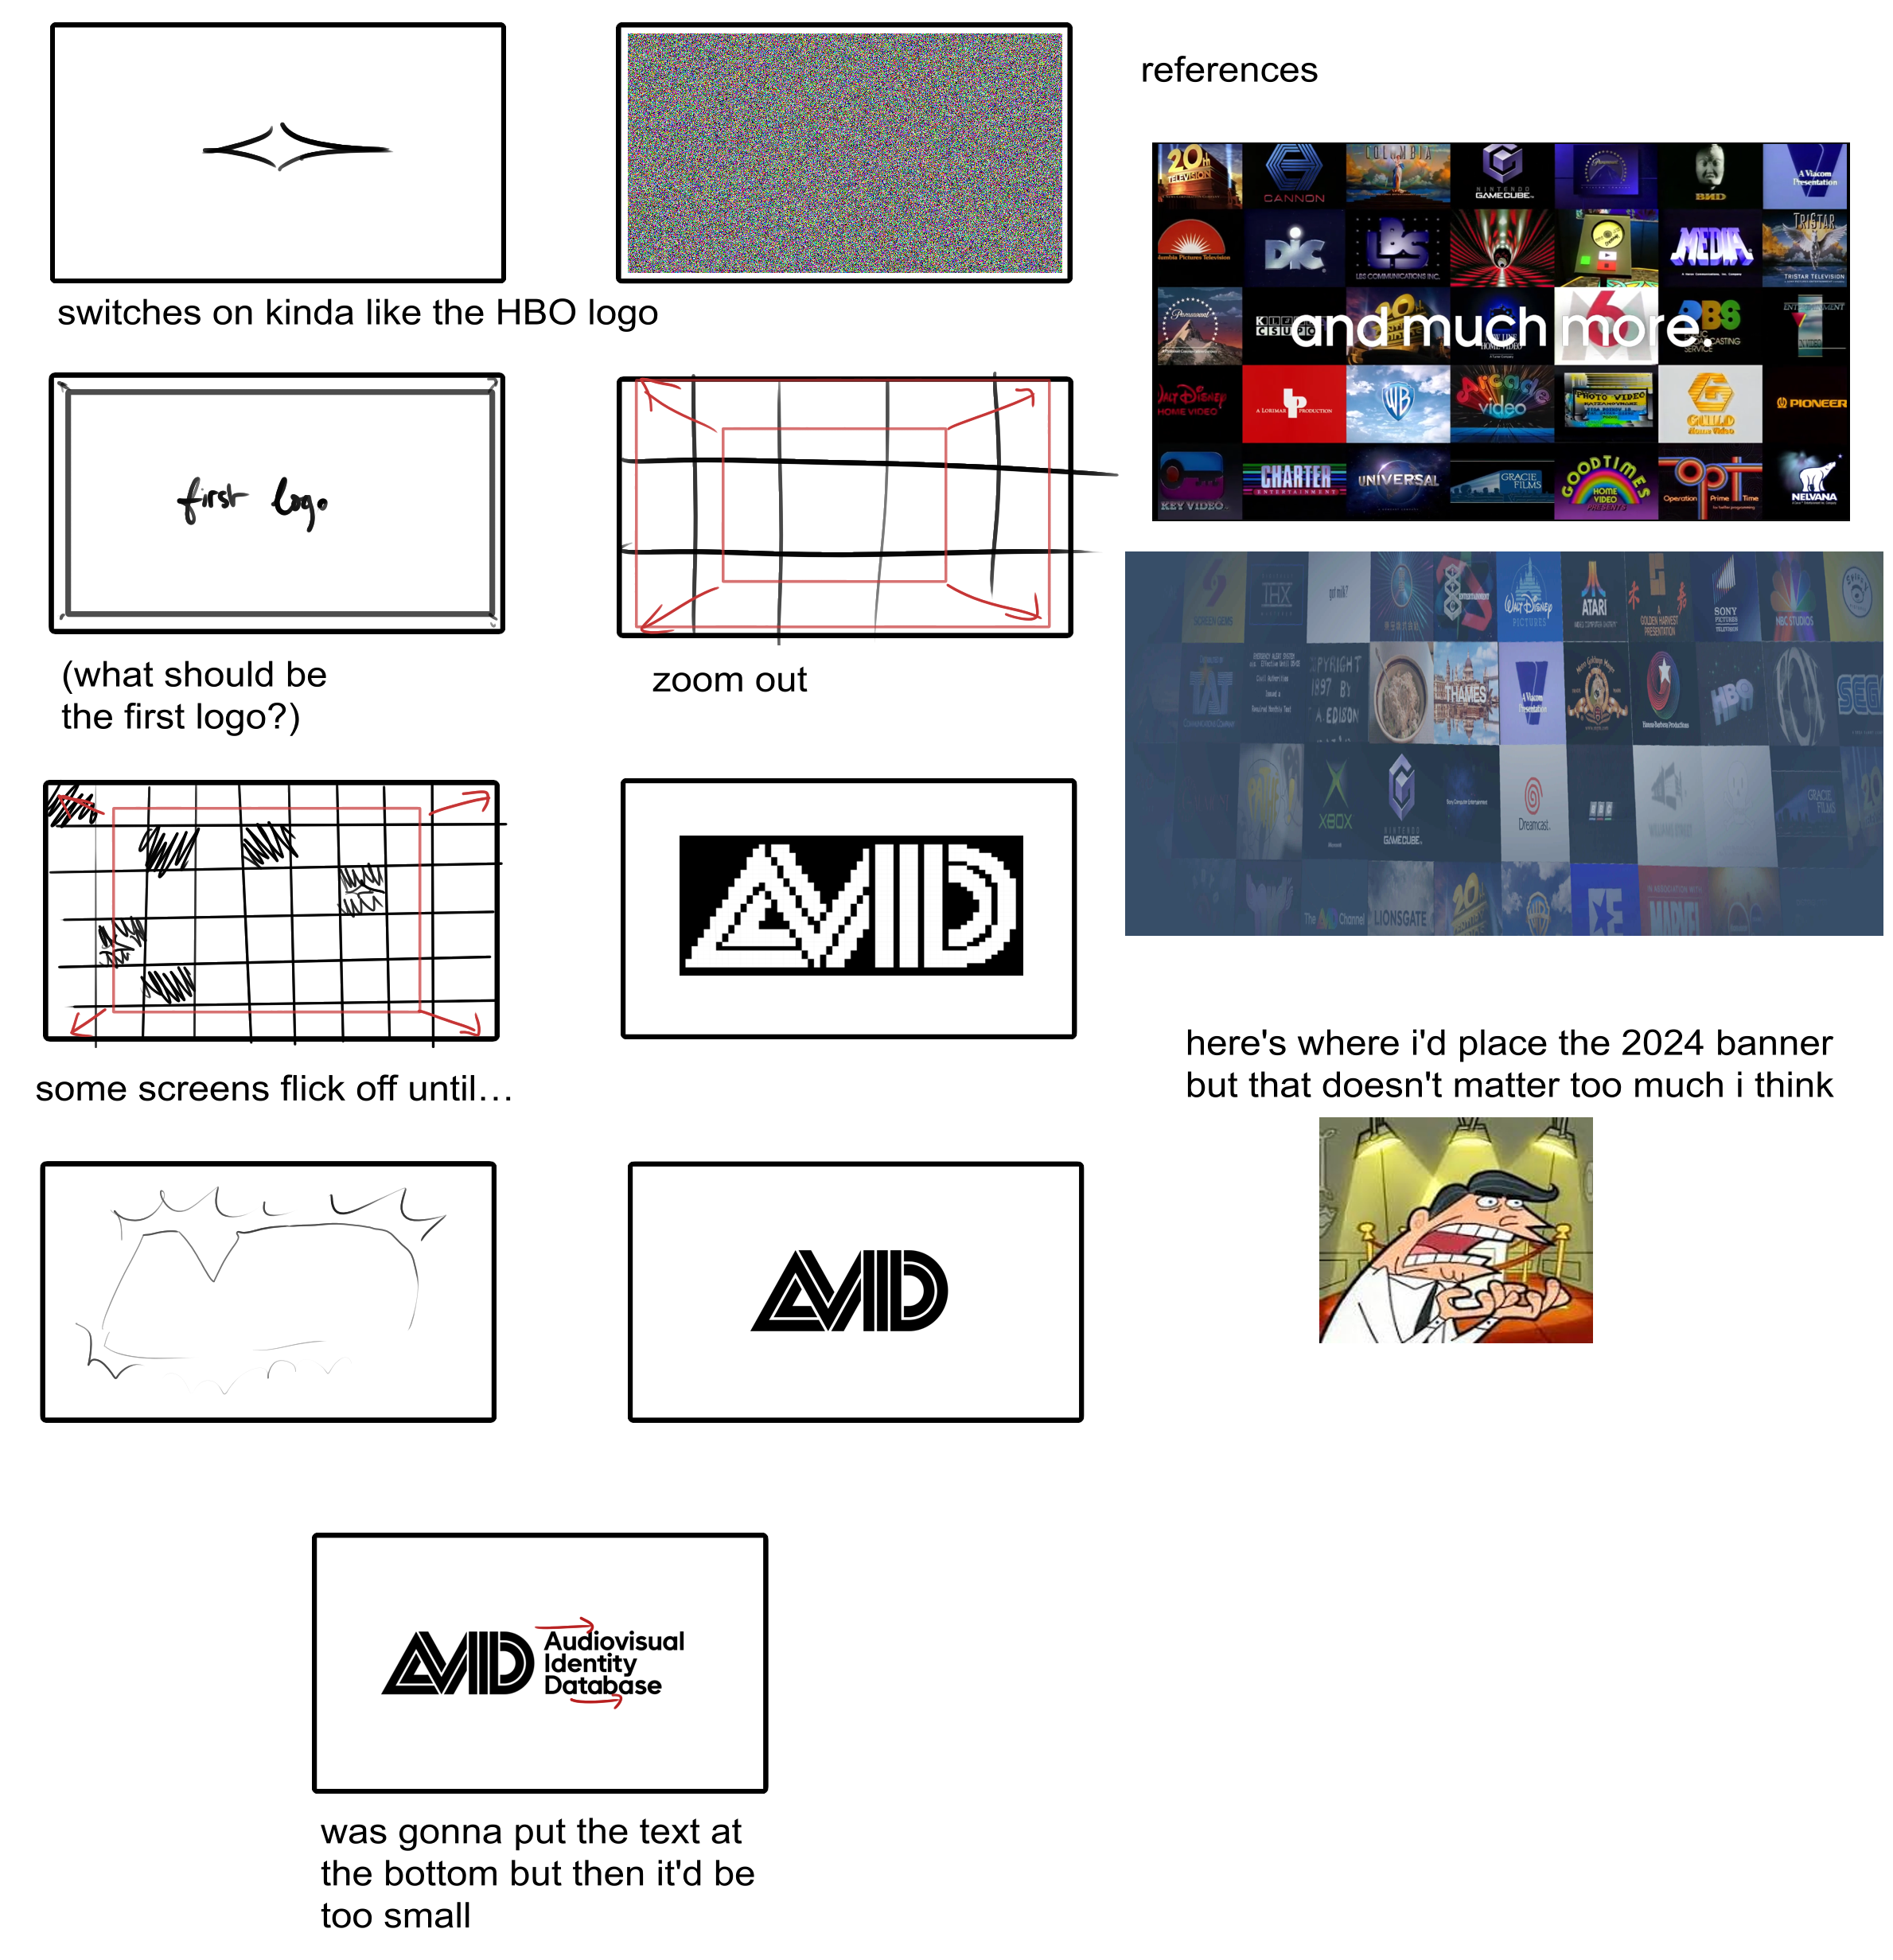
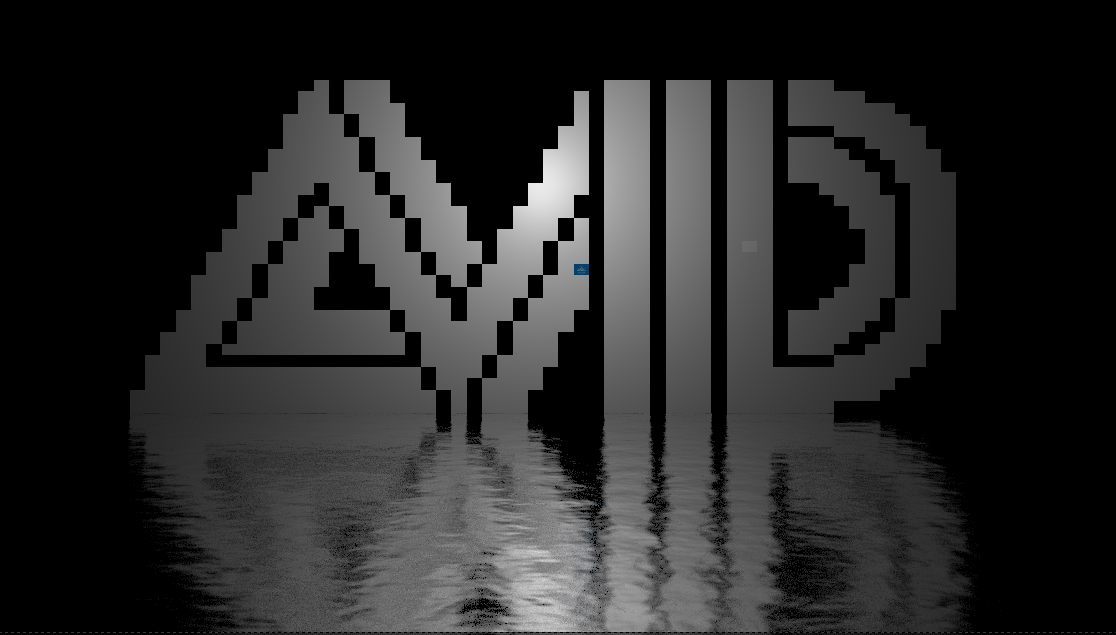
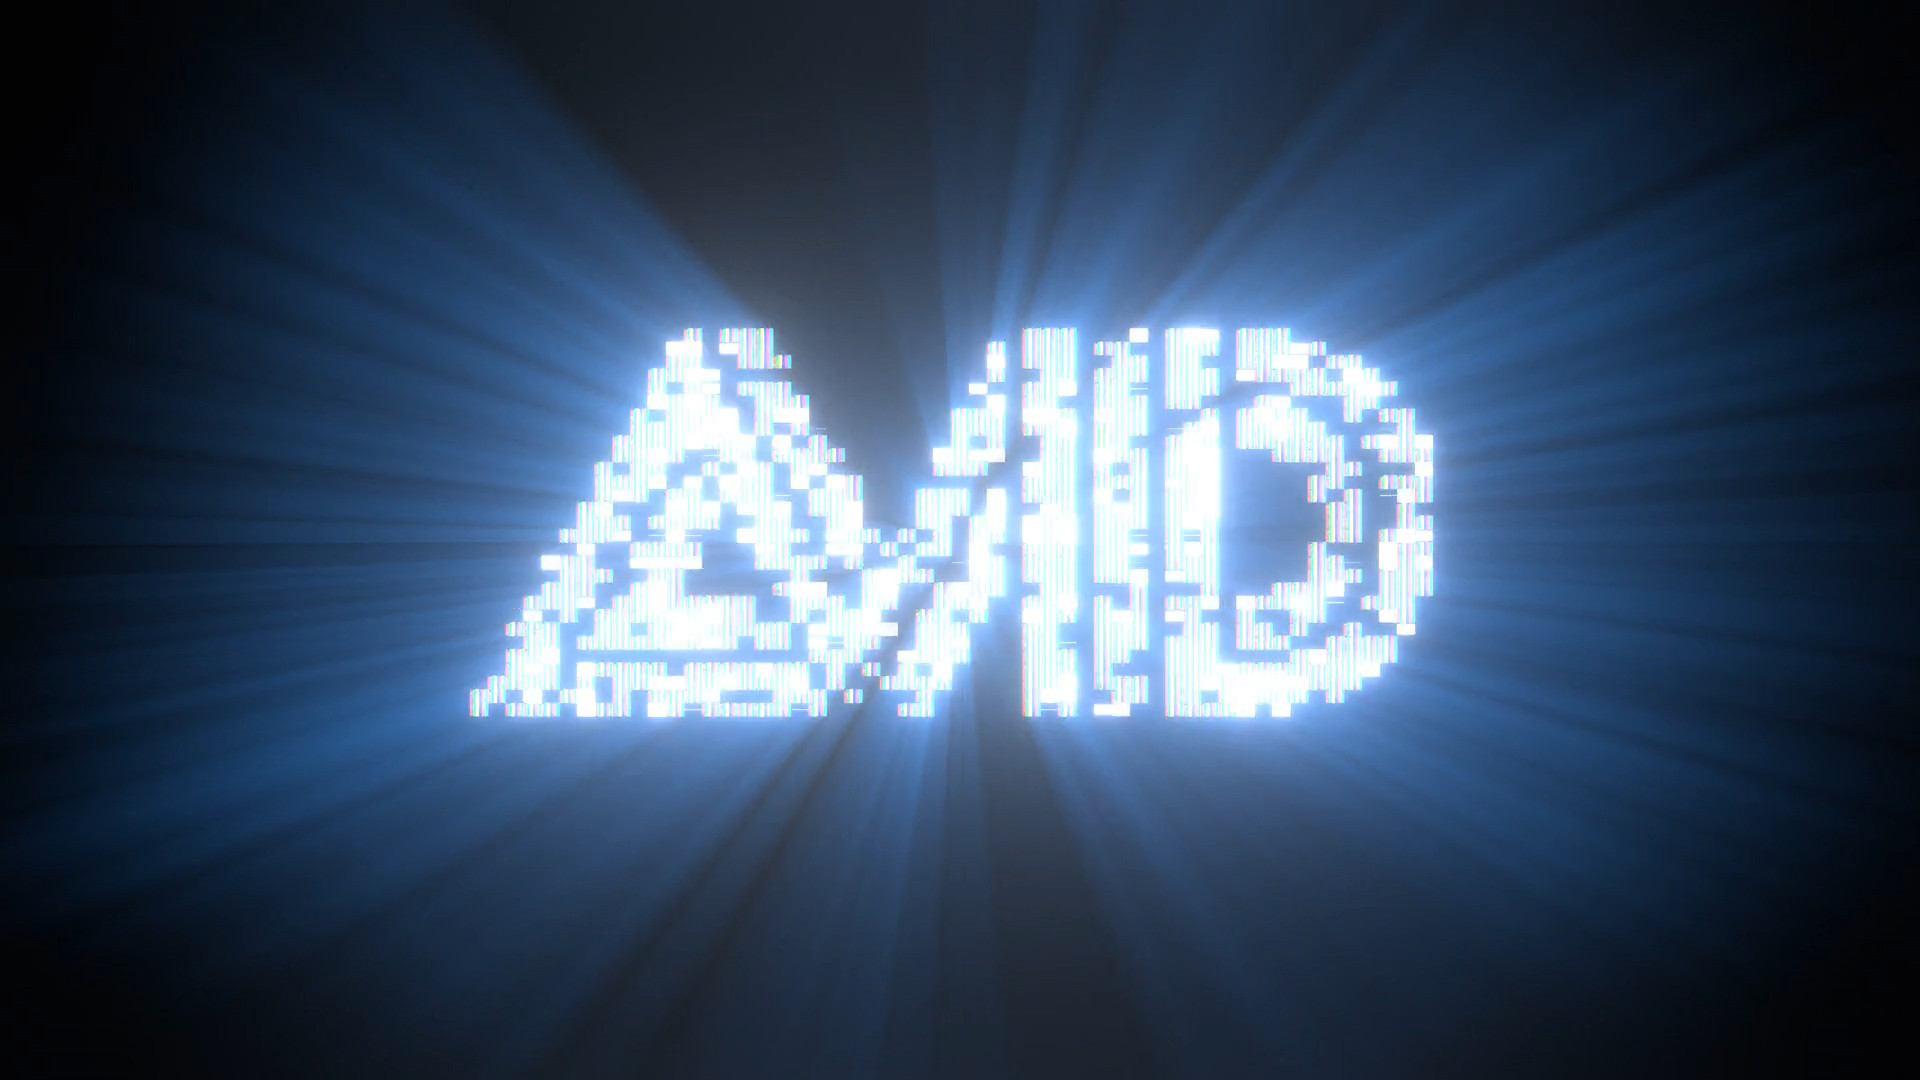
Audiovisual Identity Database
Yup. It's here. The stuff Astralite and I did is just the first 8 seconds of the thing, the rest of it is… things I personally want to get good at lmao. Think I should get the trivia stuff out of the way first:
-
The whole thing was done in Blender, using two different versions: 2.79 for the actual animation, 4.4 for the final composite with the rays and stuff.
The entire thing could have been done in one version or the other, but I used 2.79 because I thought Astra would want to do something with it, whereas 4.4 is really to make compositing go faster because it's a version where the compositor uses my GPU.
-
The video wall map was made by Astralite. It was originally a full-size SVG. He also made the concept… and the music to go with it, which is NOT the one shown in the video. Hoping it will be heard in future videos though.
-
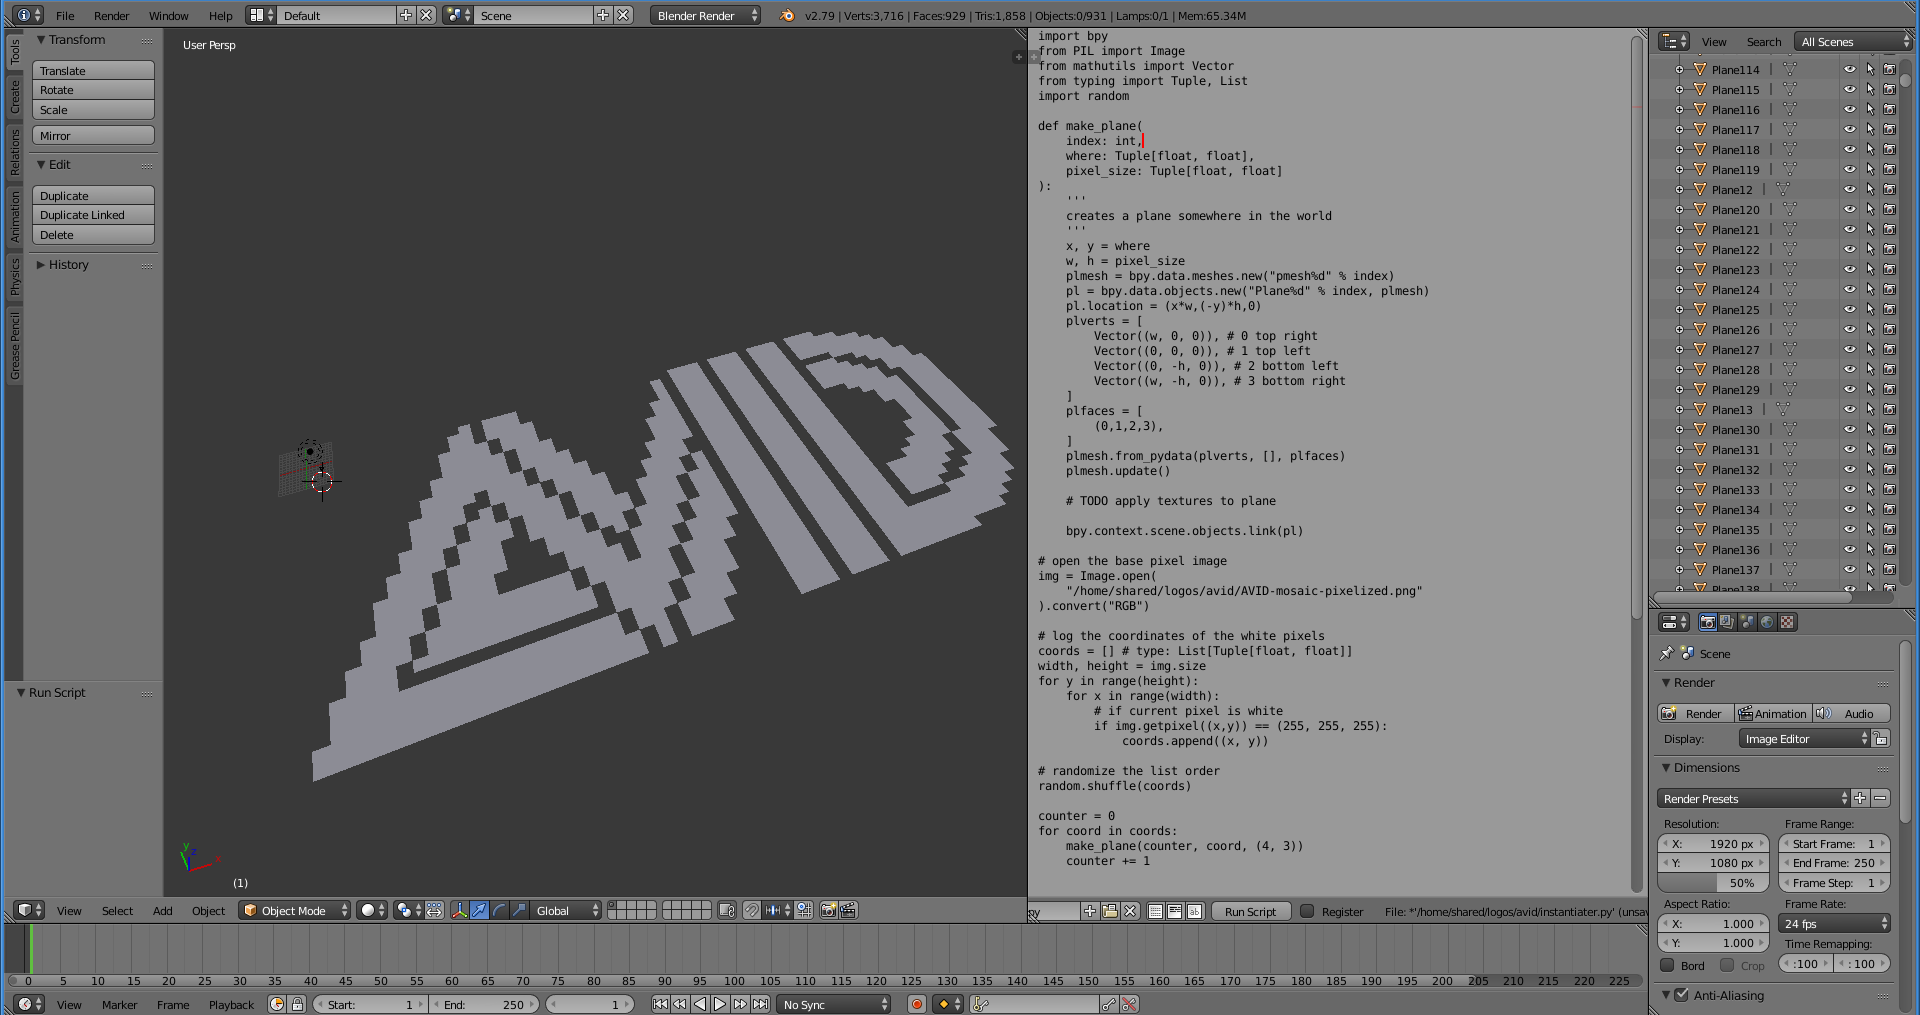
The animation was generated using a Python script. It's worth noting that the actual script is maybe about 10% of the file—that being the configuration section at the top, and the thing-doer at the bottom—the middle majority is just the PNG parser library pasted in for convenience.
This is probably the first time I had actually used Blender's Python capability for anything "hands-on". Previously I had tried to make a few extensions with it.
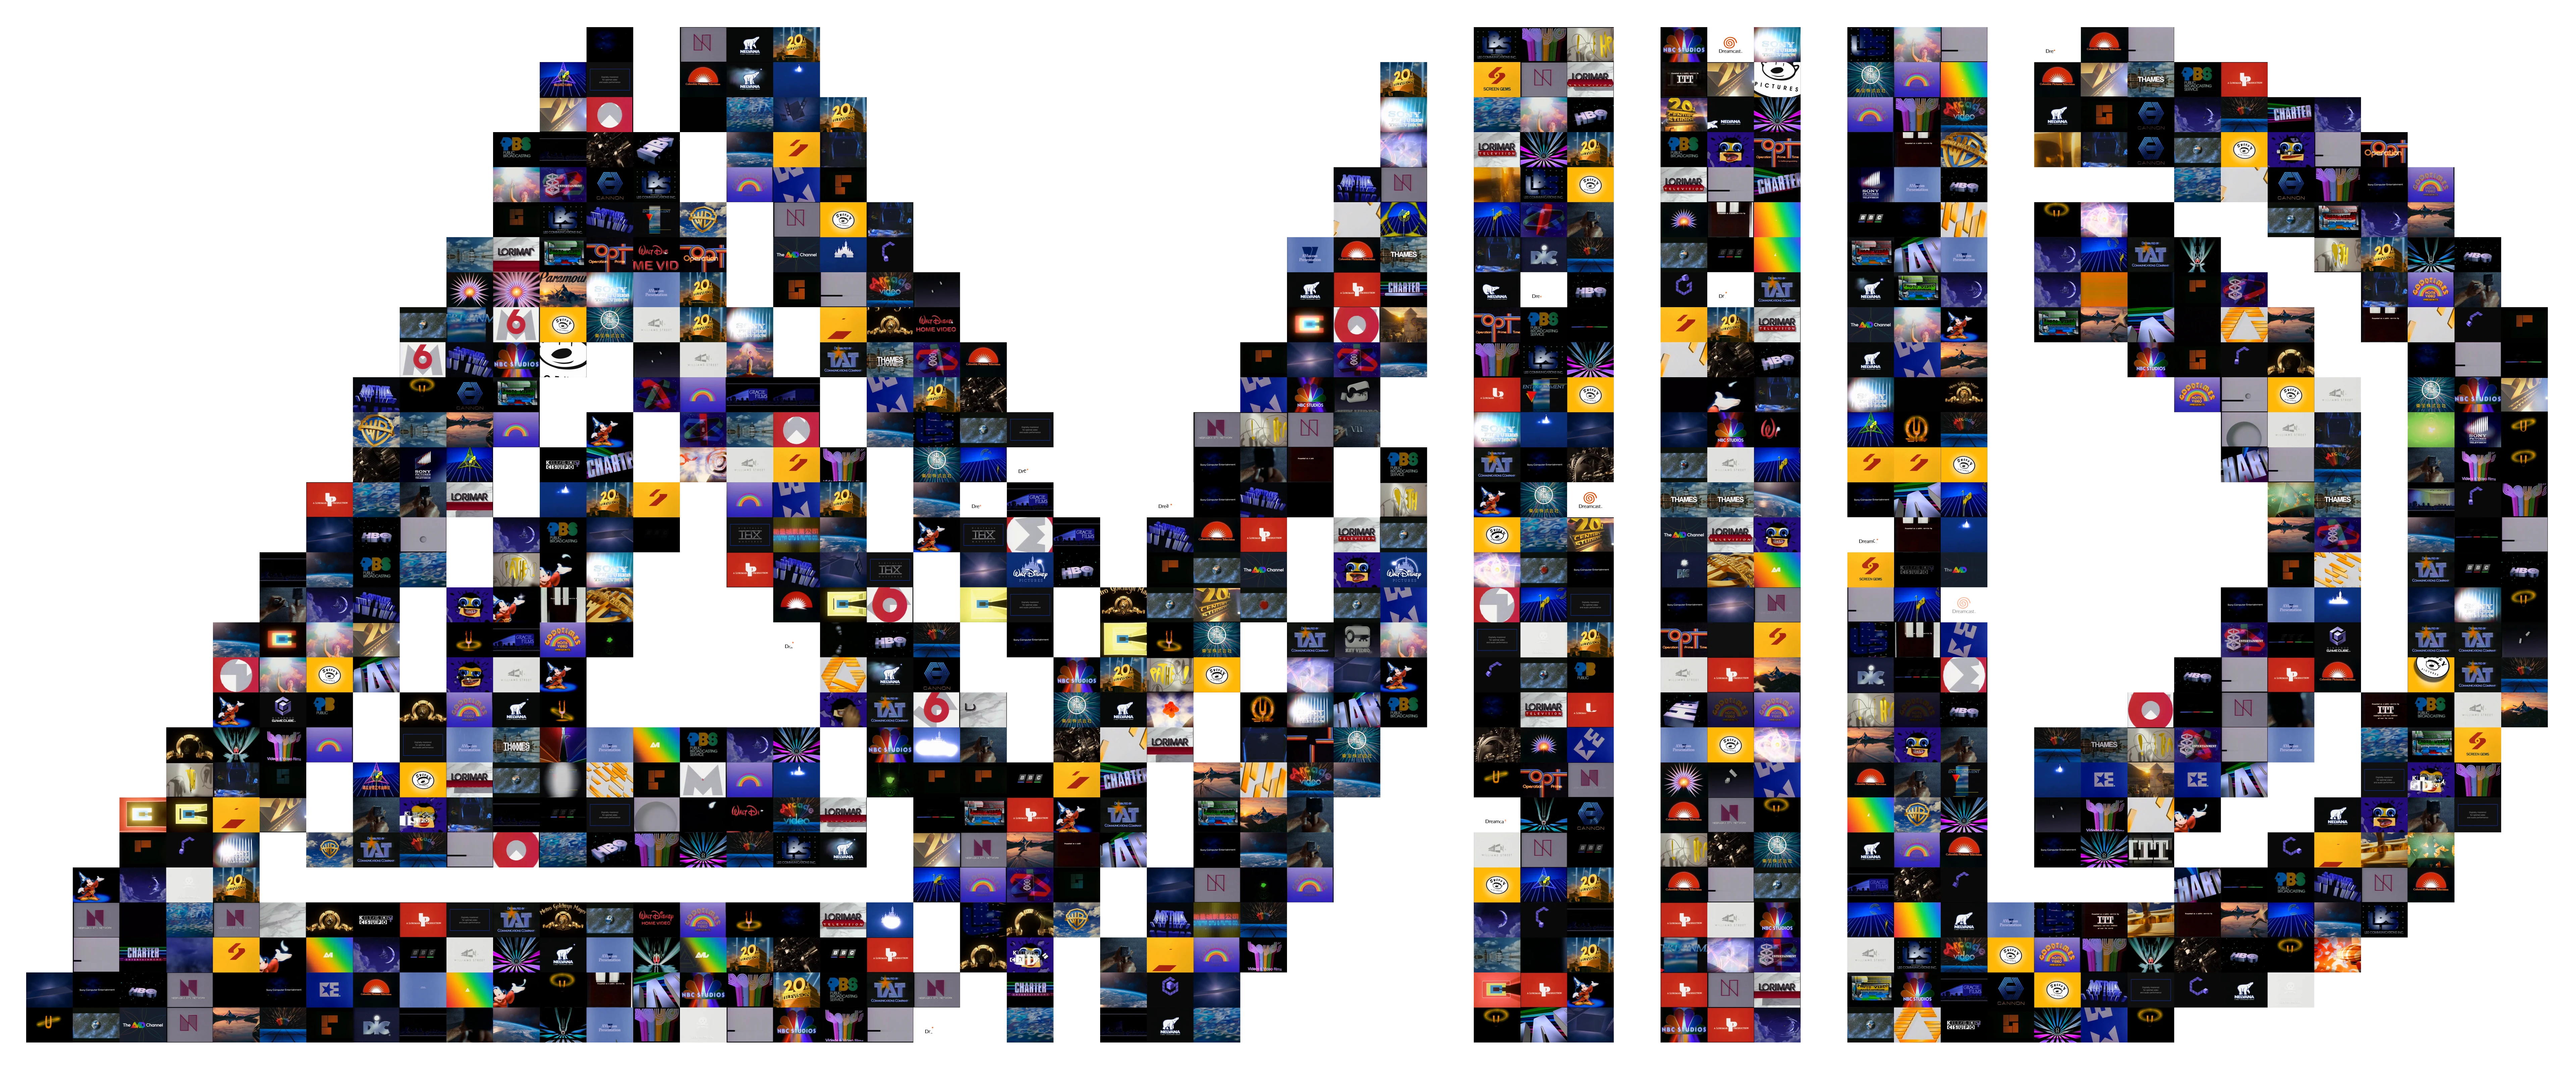
The script originally used the Pillow library, which in regular Python is one of the major libraries used to manipulate pictures. I knew of this sick trick used to install libraries using Blender Python, and it actually worked on my end. But it's a bit too impractical to expect people to install things using unconventional methods. And besides, the WHOLE kitchen sink isn't needed—just the one that does the job, in this case parsing a PNG image. Specifically, Astra's video wall map squished down to a 54×29 pixel art image consisting of only black and white (where the individual videos will be placed).
-
64 videos were used in the 927 screens. You may have noticed a LOT of duplicates—it's because the videos are assigned randomly, independent of each other. I could have figured out how to ensure the recurrent videos don't appear like literally right next to each other, but that would have taken a bunch more math and it doesn't really matter anyway.
Every one of those videos are 480×360 normalized to 60fps, because that's the frame rate the intro was originally rendered in.
-
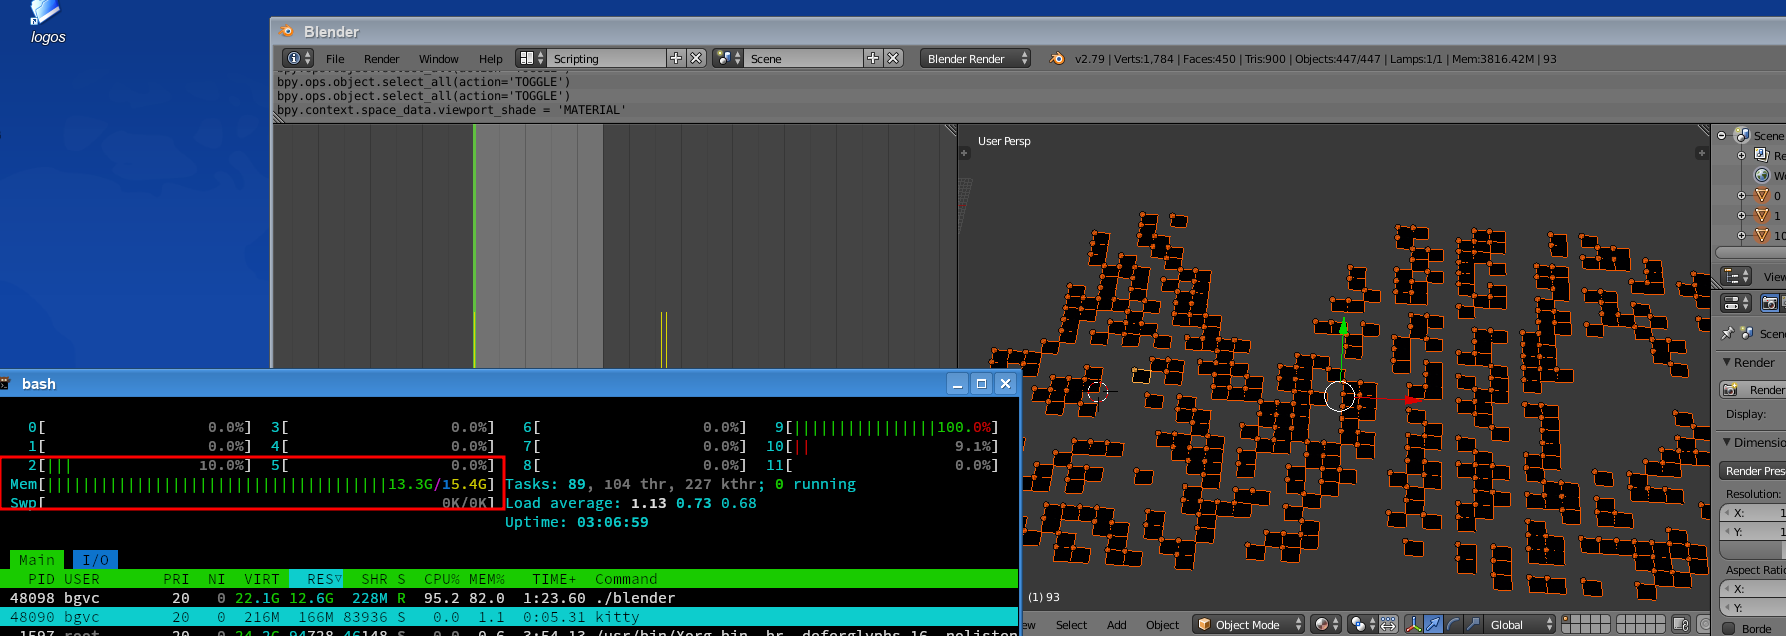
Rendering the raw animation took two hours in total, and a lot of memory. Most of the time and memory spent on loading all the video files, I find. If a lot more videos were used I would have probably run out of them, and this is in a 16 GB machine. Didn't even enable swap.
Next up, the process…
Astralite approached me for a collab on
a project at the end of February 2025, for
a new AVID visual.
We exchanged
a couple
of concepts to get
an idea of what exactly we'll be making.
This was one of the first mockups, the SVG just imported
into Blender.
The Build modifier would work here, but
then the images would presumably still need to be
assigned manually—a Sisyphean task if there was
one, considering we'd need to do it for 900+ of these
things.

But I had other plans. This sounds like something that
could be automated. Now having played with geonodes for a bit
I doubt it can be used. So I turned to what would work for sure—especially
for the version Astra was using—Python
scripting.
A short while later I managed to
instantiate the AVID logo
from the map downscaled to pixel art.
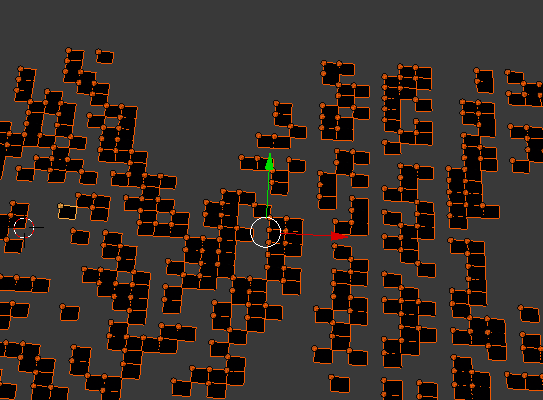
The next part was making the parts of the AVID logo map
appear one-by-one, with a video for each. A unique texture
was generated for each video and then assigned randomly.
The problem was…
it ate all my RAM,
probably because the test videos I used were all in HD. Had to
kill Blender a couple of times to prevent my computer from
freezing.

Then it was time to time the things, which of course needs math. I had a target time (5 seconds or so at this point), so I fiddled around in Desmos to get the right curve to place keyframes on. Also provisioned for the "switch on" animation, which is a separate video file also made with Blender.
Later on I tried to control which videos show up first by prioritizing the center coordinate, then the pixels surrounding it, and then the rest of the coordinates.
Once the basic animation was up and running, it was time to prepare how I might composite the thing for the final video. When all that's done, it was all just a matter of refinement.
Astralite did send me a couple of logos, but I found a lot of them too. For the ones I wanted to include, I referenced the AVID wiki header image, as well as the significant findings like TAT Communications Company, Nebraska ETV Network, and ITT Corporation.
The finishing touches were done at the end of March (there probably shouldn't be a reason for me to be taking that long). Two master versions are made, one for just "AVID" (the one that would eventually be used) and the other for "The AVID Channel". Not only are they silent, but they also end early—it's just to save a bit of file size since the logo is just a still frame and a fade out at the end. I also made sure they fit within a 4:3 safe area as well, in case it would be cropped as what I had to do with The AVID Channel ident that shows up at the very beginning.
WPIX-TV (11 Alive) - 1982 logo remake
Originally, I thought I was gonna have to figure out
how to make a flat border (NOT a bevel!) around
the logo's curves using geometry nodes.
(P.S.: please show me how, anyway)
Then I noticed this in another capture of the logo that doesn't look so shitty (from a WPIX show teaser, for some reason they opted to tint the entire thing in yellow for that purpose).
Basically, the outlines aren't actually a neat border around, it's just "drawn" using a 50-ish degree "calligraphy pen".
Which is good news for me, because then that means I can just extrude the edges and apply the trick of applying a material with a color ramp mapped to its generated texture coordinates.
This is pretty much the same trick I've used for my Metromedia Producers remake.
For the light "wipe" which reveals the more detailed logo, I originally just went with the logo, extruded up, and then using another materials trick. Unfortunately, because the transparency means the outlines of the logo are visible within the wipe, which doesn't happen in the original.
So then I just used the curve, filled in, instanced a few hundred times on top of itself, used a solid material with a gradient depending on its position, and then composited on top of the footage.
On second thought, maybe I should have used the first method with the materials of the second method. Oh well.

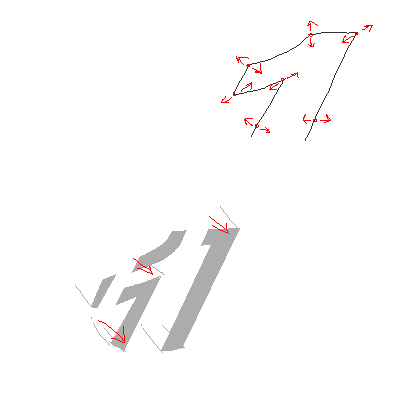
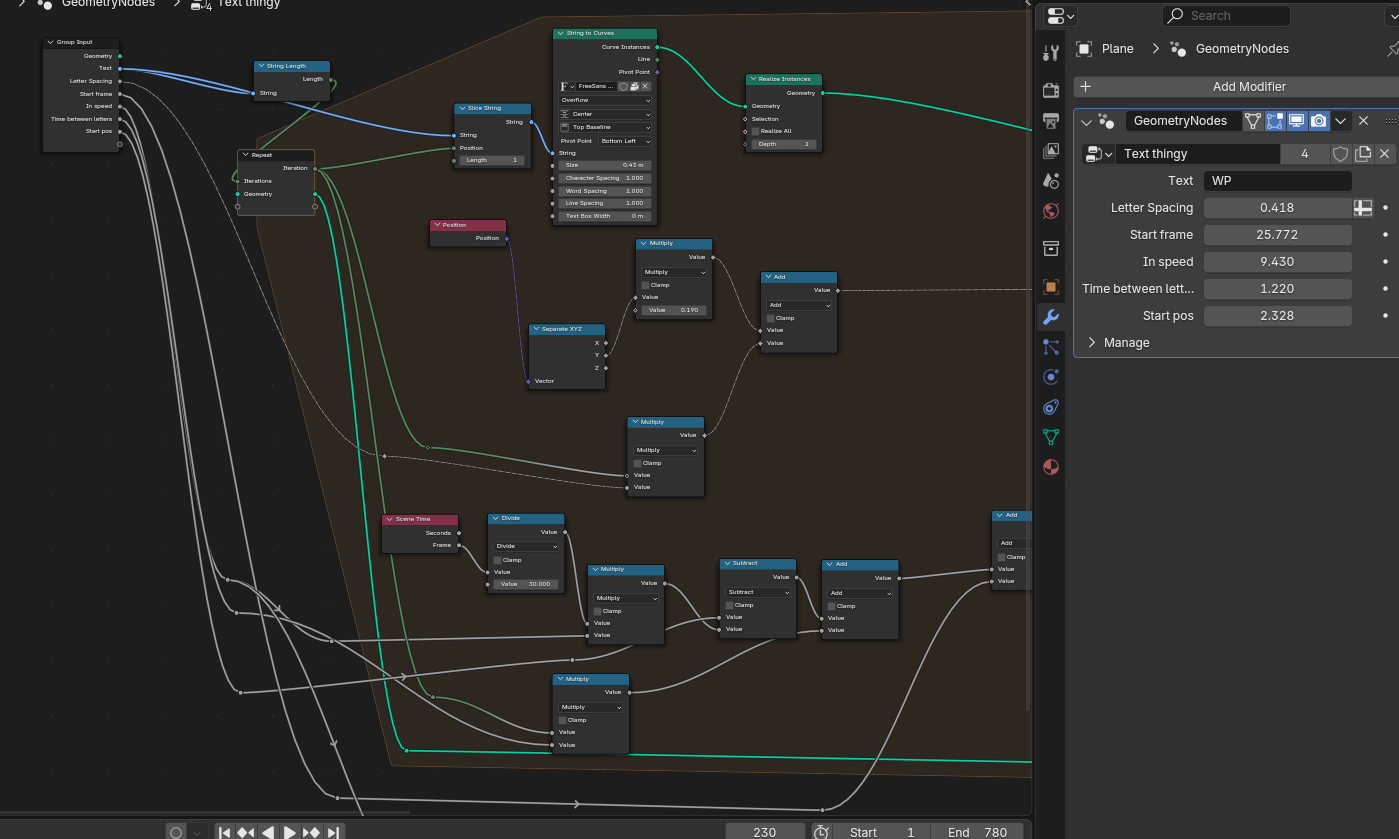
My fancy ass thought it would be a good idea to animate the text using geometry nodes instead of animating the letters one by one. (Well... turns out it is.) Needed a bit of help shearing the letters... turns out offsetting the shape like that is only supported on meshes. At least on this version of Blender. (4.3)
The text trail and the appearing letters are done in the same geometry node setup, with the appearing letters being a simple check that the text trail's Z offset is at the final position.
The most important part I learned here is, to collect all the geometry produced by every iteration of the repeat zone I needed to join the output with the input of said zone. In other words I needed to make it accumulate, because by default every iteration is just gonna replace the previous.
Before you point it out, yes I've noticed:
- The text trail at the bottom should move with the camera. Not a hard fix, that one, even with the camera still pretending that it's 2D
- The timing of the shine effect at the end could be a bit more accurate
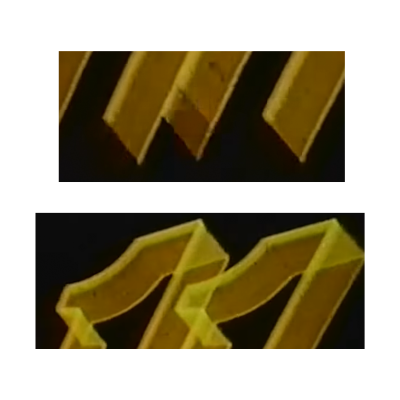
- The final "3D" logo could be aligned better (particularly the lower left part of the "11")
- The original has a tiny part of the "11" drawn before it's supposed to, not even block's remake is anal about that so I've likewise "fixed" it
Embassy Home Ent. - 1986 logo remake
Some things of note:
-
The outlined star flying in at 0:06 isn't actually flying in 3D space—it's actually parented to the camera. It “flies in” by scaling instead of actually moving towards the camera. As to how it's made to look like it's flying in behind the giant E, it's a mask that's enabled at the right moment. I really could not replicate in actual 3D how the fly-in looks in the original logo.
-
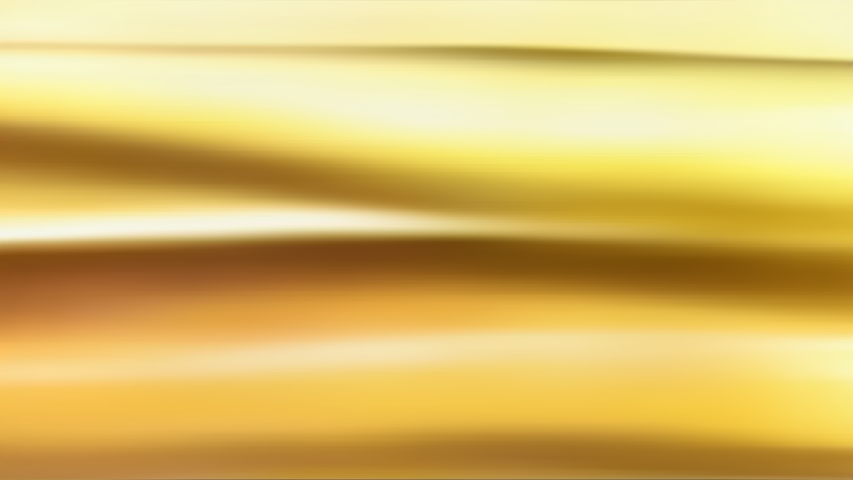
The gold texture used for the giant E stays in place, which is good because it can be reconstructed pretty well:
1. extracted and cut manually from the video frames 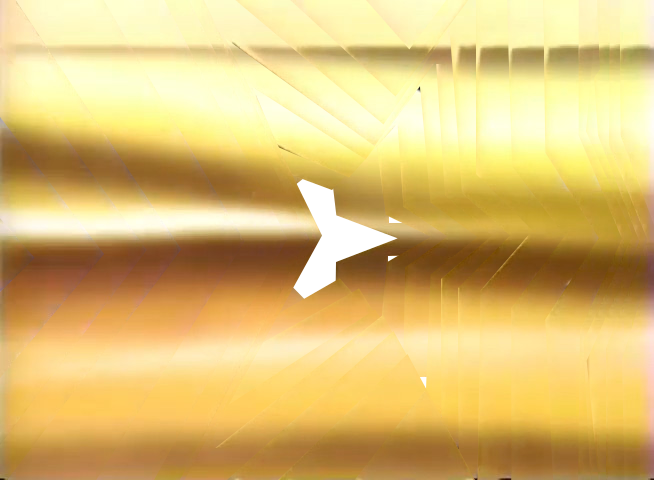
2. first round of AI inpainting (filling gaps) 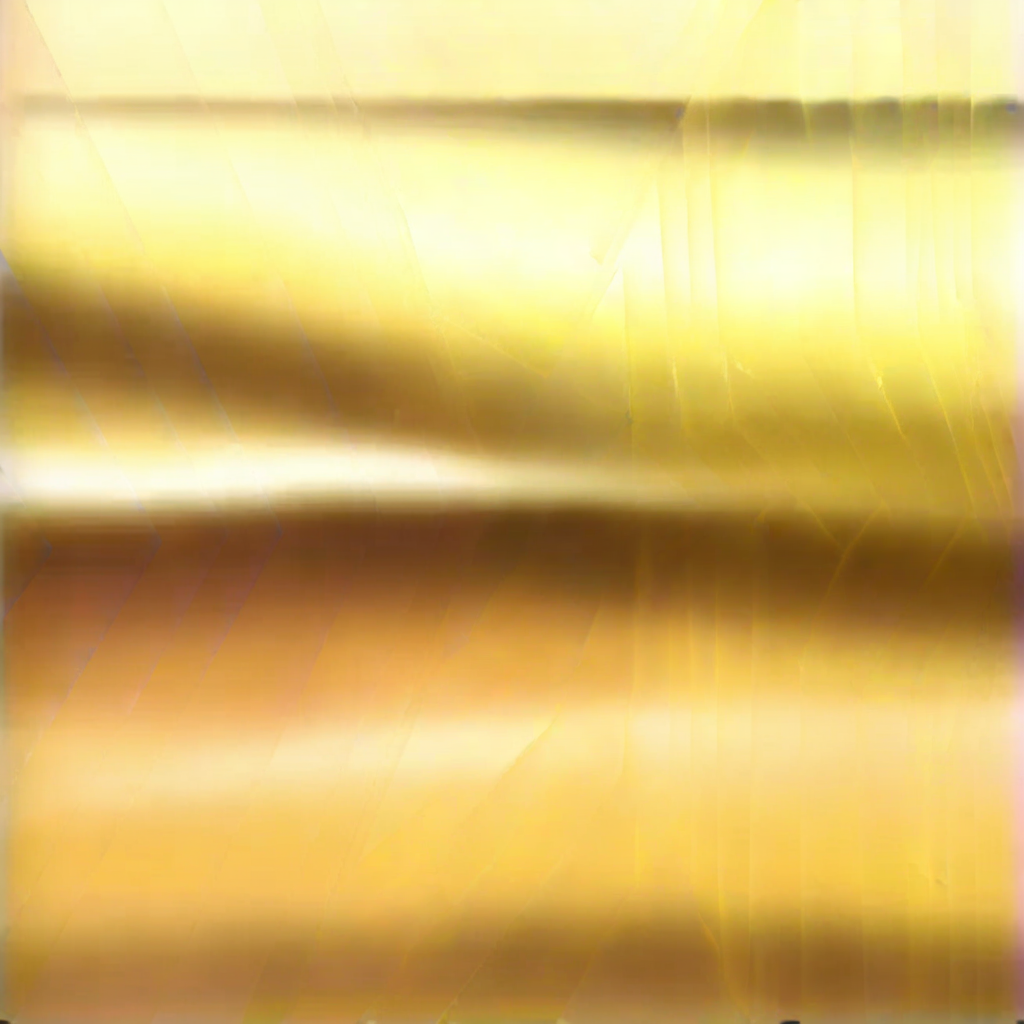
3. second round of AI inpainting (reducing seams) 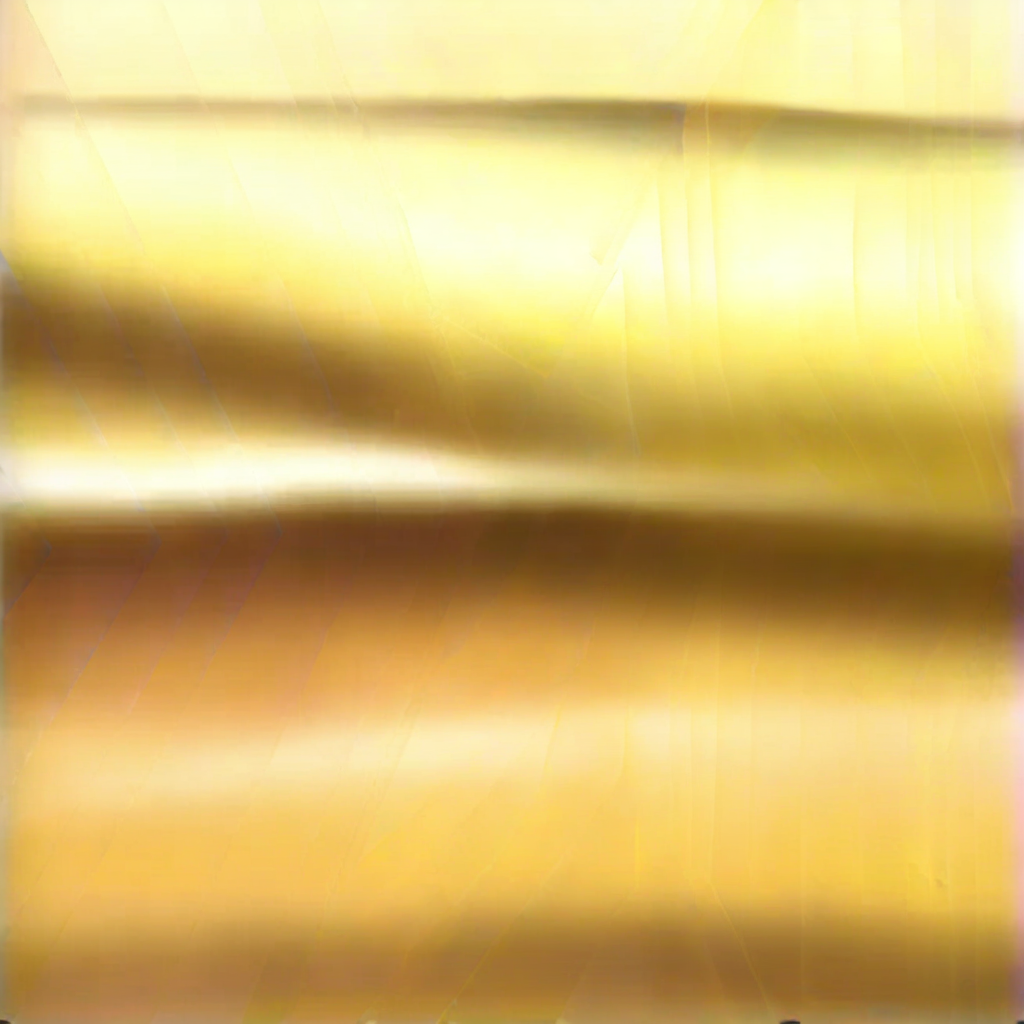
4. noise added… 
5. …for a denoiser to hide the remaining seams 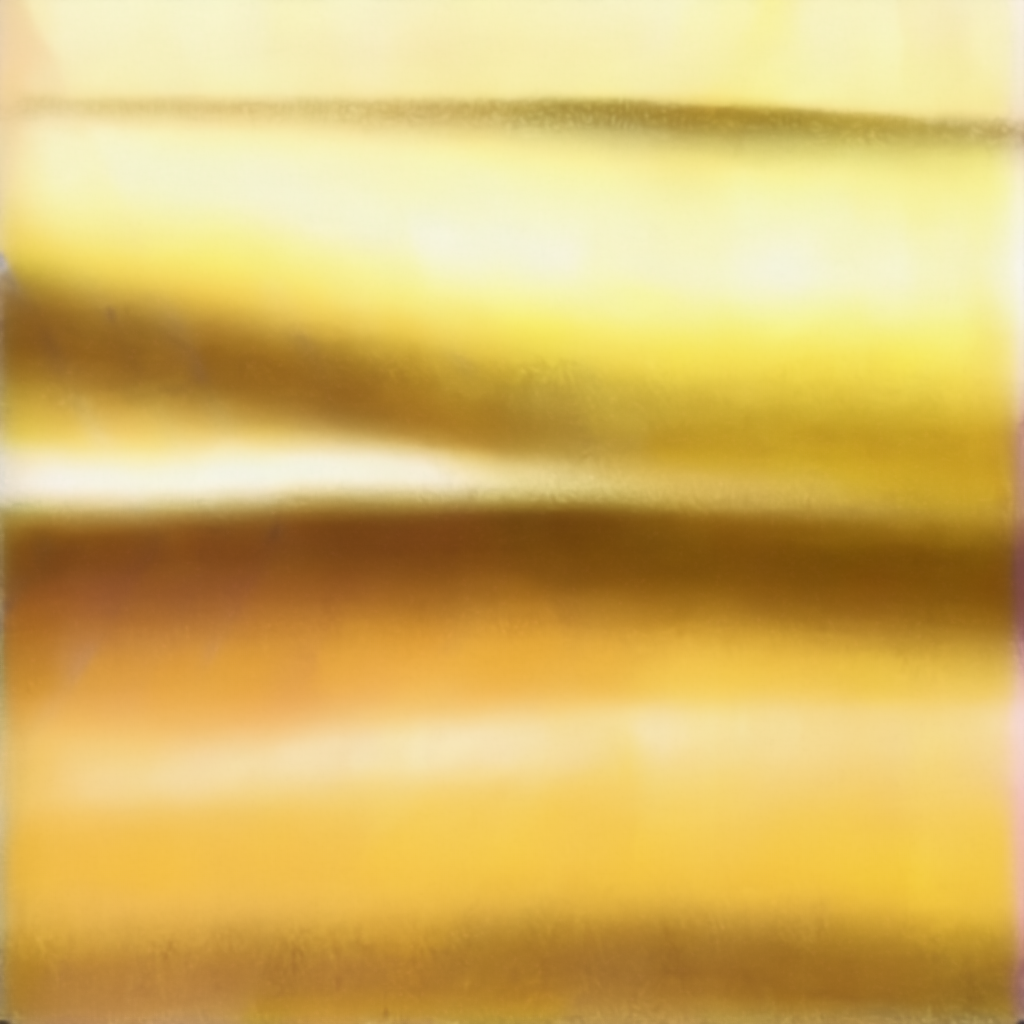
6. resize the image back to 4:3… 
7. …for AI outpainting to then extend to 16:9 so that it still looks "right"